Wednesday, October 31, 2012

Happy Halloween!

In the spirit of the fun of the day...

(Image: The Graphics Fairy  )


If we don't have rain, we'll be having our usual Halloween Block Party tonight. We block off the end of the street, and gather in the center with tables of pot-luck desserts and beverages, and buckets of treats from each house on the street. The local children have a blast visiting with us, showing off their costumes, and "going down the line" of treat buckets without having to walk both sides of the street. The adult chaperones enjoy watching the tv that's been set out in the street with us all, which is usually surrounded with a group of neighbors and visitors alike, watching with one eye whichever sports game is tuned in on it. The plan was to have the World Series tuned in this year, but the Giants swept it in four games, so who knows what we'll be watching tonight!

But for now, we return to our regularly scheduled programming...:)

Today's card has nothing to do with Halloween...or fall...or anything specific.  I felt like making something light, airy, and shabby, so that's what we have today...an all-occasion card in light grey and white, with a sprinkling of pink...


I ran out of pink mulberry roses, so I had to make my own using white ones. (I sprayed them with a mist of Spun Sugar Distress Ink refill ink and distilled water.)  They're nestled inside a chipboard heart that's been painted, inked, stitched, and sprinkled with clear German glass glitter, and sits on top of a piece of scrunched cheesecloth...


The large leaf was hand-cut from a piece of corrugated cardboard, dry-brushed with white paint, and tucked under the heart...


Instead of using a flourish of pearls as I usually do, I used the craft store (wedding section) pearl spray just the way it came out of the bag...it looks lighter and "airier" than a flourish of gems...

Supplies:
Patterned papers: Echo Park/Victoria Gardens (grey); Echo Park/Dots & Stripes Candy Shoppe (pink)
Chipboard heart: Maya Road      Pearls: Recollections       Punch: Martha Stewart Medium Branch    
Paper roses: LayoutsFromTheHeart.etsy.com      Die: My Favorite Things Royal Leaves
Miscellaneous: cheesecloth, corrugated cardboard, pearl spray, clear German glass glitter

Thanks so much for stopping in for a visit today...have a safe and fun Halloween night! I'll be back tomorrow with a long post and a card that uses a technique I haven't used in a couple years...it was fun to play with it again. :)


Sunday, October 28, 2012

TSTR - Hello, Pumpkin

We're just days away from Halloween, so what better time for a challenge from The Shabby Tea Room entitled, "Hello, Pumpkin!"  In addition,  it's my final week as October Guest Designer...and what a fun month of challenges it's been.  I'm very thankful to Debbie for honoring me with the invitation to participate for this month!

Today's card is filled with bright autumn colors...


and was based on this week's adorable inspiration photo provided by our host, Rebecca. We were to use the colors in the photo, and a flower...


Unfortunately for me, you can see where my much used and loved Epson 1900 is on its last legs...the banding I'm getting is very visible in deeply-colored prints, and is not going away with all the usual fixes. If you are using a photo-quality color printer (that uses multiple color cartridges) that you love and would highly recommend, I'm open to suggestions.  I've searched the web, read user reviews, and shopped until my mind is spinning...and still can't hit that "buy" button.  I'm a long-time Epson photo printer fan, but I'm open to alternatives this time around.

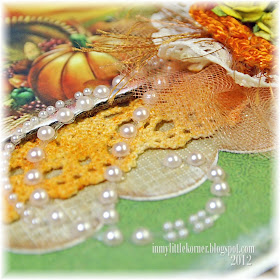
But now, back to the fun of today's card. I made a flower cluster with a base of 3 layers of gathered pale orange tulle...that little dress in the photo won my heart over.  Finding flowers in just the right shades wasn't happening, so I had to get to work coloring my own.  I left the gathered cream cotton lace in it's original color, but took one of my cream colored hand crocheted flowers, and spritzed it with a homemade mix of Spiced Marmalade Distress Ink and distilled water...blotting some of the areas off with a paper towel right after spraying to give it more of a variegated look.  The little paper roses also started off in a cream color...I spritzed them first with some Heirloom Gold Perfect Pearls mixed with distilled water, then a spritzing of Mustard Seed Distress Ink and distilled water.


The corner scroll decoration started off gold...a couple colors of acrylic paint (Sable Brown and Vintage White) lightly applied over the gold brought it to the colors I really wanted...


The cotton lace across the front also started out off-white.  A spritizing and (heavier) blotting with the same mix used on the crocheted flower gave it the yellow-orange tones I was looking for...

Supplies:
Patterned papers: Basic Grey Basics/Kraft; Crate Paper Random collection (green)
Dies: Spellbinders Classic Scallop Edgeabilities      Paper roses: CathieFilian.etsy.com
Vintage image: howtogeek.com      Pearls: Recollections and Prima      Tim Holtz memo pin (embellished) 
Hug Snug seam binding
Miscellaneous craft store supplies: tulle, cotton lace, eyelash fiber, crocheted lace, corner scroll   

Thanks for visiting today.  I hope your week is starting with a smile!


Friday, October 26, 2012

Wishing You a Lovely (Fri)Day...

I guess this week will be remembered as the "aqua/pink" week...I just realized each card I've shown this week has been some variation of these two colors. Today, all the colors are very soft and pale.

This card uses a digital patterned paper from the Color Labels set from Janet's Etsy shop, ByDigitalPapers. (I did lighten this aqua paper just a bit to coordinate it with the cardstock I wanted to use for the card base.) I printed the paper in two sizes, and centered the smaller piece over the blank center of the larger piece, raising it just a bit with foam tape.


The floral cluster in the upper corner is a mix of small paper roses, along with die cut leaves and punched filler branches.  Small single pearls are snuggled inside the floral cluster...


To accentuate the printed border around the center of the paper, I used my W1 Copic marker to create a "shadow line" inside the printed line to add some "faux dimension" around the stamped sentiment...


And finally, a couple Hug Snug bows are topped with a pearl button to the right of the sentiment...

Supplies:
Patterned paper: MyDigitalPaper.etsy.com (Color Label)      Dies: My Favorite Things Royal Leaves
Punch: Martha Stewart Medium Branch      Lace: TheFunkieJunkie.com      Sentiment stamp: Papertrey Ink
Paper flowers: LayoutsFromTheHeart.etsy.com      Pearls: Recollections
Hug Snug seam binding      Miscellaneous: Pearl button

Thanks so much for stopping by to visit today...I hope you have a fun and relaxing weekend!

Wednesday, October 24, 2012

A Fun Question...Just Because...

Let's start today's post with a fun question...can you spot the "deception" in today's card?


Answer: It looks like any other rectangular card, doesn't it?  But it's not...it's a 5" x 5" square.  The open scalloped edges reduce the solid area of the card to 4"W x 5"H, and by adding a patterned paper with a vertical line, it gives the appearance of being rectangular, like any other card in that size.  Fun illusion, don't you think?

I added some paint, ink, and clear German glass glitter to the chipboard window and flower box, using foam tape to mount the flower box over the bottom of the window, allowing room to tuck in the branches and ferns, along with little pearl-centered mini flowers...


Finding that the patterned paper was exactly the same color as the base cardstock was a very happy accident, so to make the scalloped punched edges "pop" a bit more, I dry-brushed them with white paint...


And how could I have a card without lace and gems? Just can't, that's all...

Supplies:
Patterned papers: My Minds Eye Miss Caroline/Fiddlesticks collection
Dies: Spellbinders Classsic Scallop Edgeabilities and Insert A    
Punches: EK Success Double Crochet Lace; Martha Stewart 3-in-1 Hydrangea; Punch Bunch Large Fern;
Punch Bunch Ash Leaf
Chipboard window and flower box: Maya Road      Lace: TheFunkieJunkie.com      Sentiment stamp: Hero Arts
Pearls: Recollections      Hug Snug seam binding

Thanks so much for visiting today!

Monday, October 22, 2012

TSTR - Vintage Charm

This is my fourth week as the October Guest Designer for The Shabby Tea Room, and I'm really enjoying this experience. The inspiration photos and challenges have been so much fun this month that I can say with surety that I would have participated in all the weekly challenges whether I was Guest Designer or not!

And this week was absolutely no exception...just take a peek at this inspiration photo that Tracey asked us to base our project(s) on...


Oh my stars...look at those beautiful ribbon bookmarks!  Our challenge was to use the colors in the photo, and in addition, use a charm. Well, I went so ga-ga over those ribbon bookmarks, I searched through my accessories and findings drawers, hoping I still had a ribbon clamp or two hiding in there...otherwise, I was going to have to make a special trip to the store.  A charm just wasn't enough for me...I had to make one of those ribbon bookmarks.  Not only did I find a clamp, but it was aqua...perfect for my handmade ribbon charm.  I knew I couldn't realistically put a beautifully heavy and bulky one as in the picture onto a card to be mailed, but I could follow the idea.  So make one I did...and put it center stage on my card...


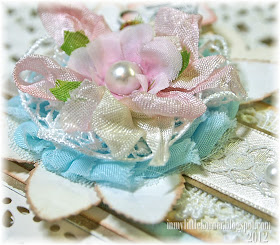
Atop the charm is a layered flower, with a shabby aqua rose at the bottom, a layer of gathered airy crocheted lace, and a trio of scrunched seam binding bows, all topped with a craft store fabric rose with a large pearl center...


The metal memo pin was dry-brushed with white acrylic paint to shabby it up a bit...there's a pink crystal spacer and a cream colored pearl added to it, too...


This ribbon bookmark accent was a lot of fun to put together. The ribbon clamp was dry-brushed with white paint to lighten it and shabby it up just a bit. A piece of cream satin ribbon with a strip of soft lace added to the center was crimped into the clamp. The pink heart is a rusted heart that's had pink acrylic paint applied over it, then rubbed off until some of the rust shows through.  (I punched a small hole in the heart with my Crop-a-dile so I could attach the jump ring through it).  The crystal bead came off an old, old, old charm bracelet many years ago, so that got added to the same jump ring as the rusted heart. I positioned the three marquis-shaped pearls at the bottom of the heart to appear as though they're part of the bead, but they're actually simply adhered to the heart itself.

Originally, I had a random cluster of pearls at the base of the ribbon just above the clamp, but that seemed to bring the eye down to the bottom of the card. So I changed it to an "arrow" shaped cluster of pearls, hoping the eye would go back up to the sentiment at the side of the flower...

Supplies:
Patterned papers: Authentique Gathering collection (cream); Prima Zephyr collection (blue)
Dies: Spellbinders Classic Scallop Edgeabilities & Classic Ric Rac Insert A Edgeabilities;
My Favorite Things Royal Leaves
Rusted heart and narrow crochet lace trim: TheFunkieJunkie.com      Aqua shabby flower: Frogfeathers on Etsy
Pearls: Recollections and Prima      Tim Holtz memo pin (painted and embellished)     Hug Snug seam binding
Miscellaneous craft store supplies: pink fabric rose, satin ribbon, ribbon clamp, white lace, bead charm,
crocheted lace (in flower)

Thank you for visiting today...I hope your week is starting with a smile!

Friday, October 19, 2012

My Creative Time - Designer's Challenge

I found this fun challenge through an online friend - someone I "met" on a scrapbooking message board about 10 years ago now.  Shar posted a fun color challenge over at My Creative Time - and, in addition to the color pallette of light aqua, dark brown, and yellow...


...we were to use at least three handmade flowers, and some "bling."  Well, if you've ever visited my blog at all, you know I can't resist a challenge like that!  :)

There are actually four handmade flowers on my card, not counting the three clusters of tiny punched flowers.  Three are paper roses made with Prima and Kaisercraft "flat" flowers (remember those jars of flowers we used to go crazy over? Yep...those are what these three paper roses are made from.)  There's a wonderful tutorial that Nic Aspinall put up on the web a few years ago...if you're interested, you can find it here .

The fourth is the hand-crocheted flower that the aqua rose nests in.  I initially learned to crochet this type of flower from this site, but if you're not a crocheter by heart, Nichole Heady put up another tutorial with more detailed step-by-step photos here.


I wanted to add a small touch of another accent color, so I punched tiny flowers from a coordinating orange cardstock, then dry-brushed them with cream paint for a more distressed look, and put tiny little pearls in the center of each one...


The large aqua rose has been dry-brushed with cream acrylic paint, the edges inked, then the flower sprinkled with clear medium glitter before it was nestled down into the center of the crocheted flower, and a pearl added to the center...


The scallops on this lace match the spacing of the scalloped die cut edge perfectly, so I couldn't resist adding the lace border...

Supplies:
Patterned papers: My Minds Eye Miss Caroline/Dolled Up collection
Dies: Spellbinders Classic Scallop Edgeabilities; Memory Box Elegant Scrollwork
Punches: EK Success Diamond Lace; Martha Stewart 3-in-1 Hydrangea, and Medium Branch
Scalloped lace: TheFunkieJunkie.com (tea-dyed)      Pearls: Recollections      Sentiment stamp: Hero Arts
Handmade paper roses and crocheted flower (cut Prima flowers to form leaf clusters)

Thanks so much for visiting today...I hope you have a wonderful weekend!

Wednesday, October 17, 2012

Thanksgiving joys...

I hope you're having a great week so far.  The last month has seemed to fly by for me...and we're just easing into the holiday season, when time seems to pass doubly-fast!  But I'm starting to enjoy making cards in advance of the holiday season, and today I have another Thanksgiving card to share with you.

This card started as all rectangular, which, to me, seemed to need some easing.  So I rounded the lower corners, added a wide scalloped edge to the left side, the circular heart chipboard frame for the sentiment, and a small piece of scalloped crocheted lace on the lower right.


There's a dusting of large clear coarse glitter on the leaves and grains in the image...but it's hard to photograph the subtle sparkle they add...


Looping some pearl "ribbon" through the dyed scrunched seam binding bows adds a little touch of "bling" without hiding the image and the sentiments...


I love the charm of the vintage sentiments alongside the beautiful images on vintage cards...so I highlighted this one with a chipboard heart circle, inked and lightly dusted with more clear German glass glitter ('tis the season to use glitter!).  The piece of crocheted lace is tucked just under the lower corner of the image block to soften all the edges at the lower corner...

Supplies:
Patterned papers: Authentique Gathering collection      Vintage image: webshots.com
Dies: Spellbinders Classic Scallop Edgeabilities      Chipboard heart frame: Maya Road      Pearls: Recollections
Lace: TheFunkieJunkie.com      Hug Snug seam binding
Miscellaneous: cotton lace, pearl trim, button, clear German glass glitter, Martha Stewart coarse clear glitter

Thanks so much for stopping by to visit today!


Monday, October 15, 2012

TSTR-Rustic Elegance

Oh how I love challenges like this week's at The Shabby Tea Room...we were asked to use the inspiration photo, and include something rustic, and something elegant.  Just take a peek at all the wonderfully contrasting textures in this photo Rebecca chose for our inspiration...


For me, this signalled a call to bring out all kinds of fun embellishments, place them out on the table in front of me, and, like a kid in a candy store, go to town!  That's pretty much exactly what I did, and here's the card that's a result of that fun...


The rustic: the rusted heart, shabbied up with a touch of paint around the edges, and a small dusting of clear coarse glitter (that didn't photograph well at all); the burlap pennants peeking out under the crocheted flower; the corrugated, painted, and glittered butterfly; and the tea-dyed cheesecloth beneath the floral cluster.

The elegant: the large rhinestone brad in the center of the pink felt flower; the pearl and crystal clusters; the two clear pendants hanging from the flowers; the gathered lace at the top of the manila tag.

This has become my most recent "favorite" creation...LOL.  And once again, I have just the person in mind for this fun and eclectic card.


Supplies:
Patterned papers: Collage Press/Pink Paislee London Market Collection
Dies: My Favorite Things Royal Leaves and Mini Rolled Roses     
Punches: Martha Stewart Medium Branch, Fiskars Scalloped Sentiment
Rusted heart, white burlap, corrugated butterfly: TheFunkieJunkie.com      Tag: American Tag Co.
Pearls & clear crystals: Recollections      Hug Snug seam binding
Miscellaneous: hand crocheted flower, crystal brad, cheesecloth, crystal drops, clear coarse glitter

Thanks for visiting today...I hope your week is starting with a smile!

Friday, October 12, 2012

Simply the Best...

This is one of "those" cards that started in one direction, and wound up going another. When I die cut the card and added the patterned papers to the front, I had one idea for it.  Then I started assembling the floral cluster, and once I added a bit of Stickles glitter to the tulle layer, the card took a decidedly "icy" turn. :)

It began to look like a winter flower...and that's the new direction I let it go, by adding a silver and sparkly center, and white punched mini floral branches...and a bit of inking and glitter on the leaves of the larger branch die cut.  So, although the colors aren't what you'd traditionally consider "winter colors," the card definitely has a fall/winter feel to it.


The floral cluster starts with a loopy-edged die cut, then a tea-dyed and gathered piece of cotton lace, topped with a double layer of gathered tulle sprinkled with Stickles glitter, and finally some cream and white small branch punches and a glittery floral center with white sequins, silver beads, and clear crystals...


After die-cutting the leafy branch, I distressed it with random swipes of brown ink and topped it with a dusting of clear German glass glitter for a wintery feel...


The white crocheted lace was "faux tea-dyed"  (I didn't have the time to actually dye it in tea, but sprayed it with Tea Dye Distress Ink diluted with distilled water...it gives a very similar effect). I like this sentiment because of its versatility...aside from a wonderful friendship greeting, it's also perfect as a thank you...

Supplies:
Patterned papers: BoBunny Gabrielle collection      Sentiment stamp: Technique Tuesday
Dies: Tim Holtz On the Edge/Brackets; Memory Box Quinn Flourish; Sizzix Flowers Branches and Leaves
Punch: Martha Stewart Medium Branch      Flower center: Prima Raja Sequin Silver
Pearls: Recollections      Lace: TheFunkieJunkie.com
Miscellaneous: clear German glass glitter, Crystal Stickles, tulle, cotton lace

Thanks for visiting today...here's wishing you a fun and relaxing weekend!


Wednesday, October 10, 2012

A Sunshiny Heart...

I love the sentiment in the vintage image on this card. I had printed it out a while back in anticipation of the fall holidays, and realized yesterday...that's now! So here's the first of probably several Thanksgiving cards you'll see here in the next few weeks...


Even the ruler paper had the word "happy" on it...the fact that it still showed after I adhered the image was a "happy" accident...


After painting the chipboard heart frame, I added a coating of clear German glass glitter...I love the texture and slight sparkle this glitter gives to things...


After tucking a few mini banners behind the image, I thought it needed a softer edge, so I crumpled up a small piece of tea-dyed cheesecloth between the image and the banners...

Supplies:
Patterned papers: Echo Park This & That Charming collection; Echo Park Dots & Stripes
Candy Shoppe collection (brown stripe)
Vintage image: Dover Publications      Chipboard heart: Maya Road      Pearls: Recollections
Scalloped lace: TheFunkieJunkie.com (tea-dyed)      Cream paper roses: CathieFilian on Etsy      Hug Snug seam binding
Miscellaneous: clear German glass glitter, button, crochet thread, cheesecloth

Thanks so much for visiting today. I hope you're having a great week so far!