Sunday, April 1, 2012

The Song in my Heart

...is a little off-key tonight.  Have you ever had a little misstep, and after you recovered from the shock, wondered "how did I DO that?"  Yeah...that's me.  A simple step the wrong way, one ankle twists to one direction, the other leg twists in the opposite direction, and the end result? Me on the floor.  And now I'm friends with the ice pack and the Advil bottle.  The good part?  It happened after the house was cleaned and vacuumed...so at least I'm not feeling guilty...just clumsy and silly and sore. LOL  So, more computer time tonight for me!

The other day, a box arrived in the mail, and inside were some wonderful new Echo Park paper packs.  One was this Melody of Life Mini Theme pack. The papers are beautiful shades of taupe and grey and white, and I immediately started designing cards in my mind.

For this first card, I kept to the music theme of the papers and cardstock stickers in the pack, but added a little "love" to the mix...


I backed the treble clef cardstock sticker onto white chipboard, then trimmed it, to sit on top of the chipboard heart and white bows...


and printed the sentiment onto a tag to slide under the sticker...


Supplies:
Patterned Papers: Echo Park Melody of Life, "Journaling" "Words" & "Piano;
Echo Park Victoria Gardens collection (yellow pattern on chipboard heart)
EK Success Diamond Lace edge punch      Pearls: Prima      Lace: Little Red Cottage on Etsy
Hug Snug seam binding      Handcrafted stick pin using Maya Road heart pin as base

For the second card, I wanted to make a monochromatic wedding/anniversary card. I say "wanted" because once again, while I started with just the beautiful taupes and soft whites, the dark rose found its way right onto the card...I tried to resist, but it was useless! LOL  I was so tickled to find that I had some Prima roses that were the perfect shade of taupe to match the papers.

On the bottom edge, I once again used Spellbinders' Grand Labels 23...but only one edge of the rectangle... to form the shaped bottom edge.  That's one of the fun things about the larger Grand Labels...they're more than just the entire shape...they're large enough for many card shapes to fit inside the die so you can cut single edges only.  This one has a bit of a different twist on the traditional scalloped edge...


I stamped the sentiment onto a Spellbinders Labels 10 backed with white chipboard: 


Supplies:
Patterned papers: Echo Park Melody of Life "Words" ("b" side) & "Piano"
Spellbinders Grand Labels 23 and Labels 10      EK Success Threading Water edge punch
Felt doily: My Favorite Things Decorative Doily Duo die      Paper leaves & roses: Prima
Pearls: Recollections      Handcrafted stick pin      Hug Snug seam binding

Thanks so much for stopping by.  Since it looks like I'm moving slow the next few days, I'm thinking more card making is on the schedule, especially since I still have several new paper sets to play with!


Saturday, March 31, 2012

Challenge, Take Two....and Three!

You know that challenge I posted about a couple days ago?  This one at The Shabby Tea Room:
where I had just made a card that fit the challenge, but fit the samples a little too closely for my comfort?  Well....Friday turned out to be a very productive day...not only did I get another card made for the challenge, but I picked up some additional pieces of paper and made a third card!

So here's how challenge card #2 turned out.  When I worked at the scrapbook store, there was a butterfly die that I was especially fond of.  Before the store (sadly) closed a few years ago, I cut some chipboard and paper butterflies using that die before it went away...and I still have some left.  It formed the base for the embellishment cluster on this card...


Supplies:
Patterned papers: Fancy Pants Floral Chic (lilac); Echo Park Dots & Striped (yellow dot)
Laces: local craft stores      Paper doily: Wilton (colored with Dusty Concord Distress Ink)
Paper flowers and Pearl flourishes: Prima      Sentiment stamp: Hero Arts
Hug Snug seam binding      Fern punch & Clear coarse glitter: Martha Stewart
Miscellaneous: Die cut chipboard butterfly; twine

And after this one turned out so well, I glanced over at a shaped card base I had made with one of my trusty Spellbinders Grand Labels dies, and card #3 was on its way to completion.  I found a package of Martha Stewart cotton lace butterflies sitting in my "use me!" basket, so I added a little bit of clear glitter to the top of it, then layered it over a couple punched butterflies to give a "fluttering" effect. 


Supplies:
Patterned papers: Melissa Frances "Antonia" (blue); Basic Grey Kioshi collection (floral)
Spellbinders Grand Labels Four      Lace: Venus Ribbon      Pearls & Paper roses: Prima
Lace butterfly & Butterfly punch: Martha Stewart      Sentiment Stamp: Papertrey Ink
Hug Snug seam binding     EK Success Double Crochet Lace edge punch

When I first saw this challenge, I wasn't sure I could get more than one more card with it..  But sometimes it's the challenges you're the least sure about that turn out to be the most inspirational...and this was one of those challenges. 

Thanks for stopping in.  I received a fun box of beautiful new Echo Park papers today...guess what I'll be playing with tomorrow?

Have a wonderful weekend!

Thursday, March 29, 2012

Creative minds often think alike...

I almost didn't post this card...and in a minute, maybe you'll understand why I was hesitant to post it without some background.  :)

I had the good fortune last week to meet an old friend of my husband's who stopped to visit during his trip to the states. Dear husband happened to mention my little "card addiction," and...well, suffice it to say, a nice number of my handmade cards are now about to travel overseas to Europe to new owners...yay!  I had to work fast to replace cards for my little Etsy shop, as well as for my personal "set-aside" stash.  What a happy predicament for a crafter, hmmm?

So I quickly started "card-lifting" some of my previous card designs and making new cards. I was able to make 4 new cards and modify 2 already made, and get all 6 photographed and into my little online shop.  Three more were nearly complete, and waiting for a sunny day to photo. After the frenzy, I was creatively blank...so I headed over to The Shabby Tea Room on Tuesday for a little bit of inspiration, knowing there was a new weekly challenge posted...and a pretty one it is:


The challenge is to use lilac, blue, yellow, and brown, and include a butterfly.  And I looked over to one of the cards I had completed, but not yet photographed, and what do I see?


Pretty perfect, hmmm?  I had even "shabbied" up the edges of the card by applying a heavy dusting of white ink around the edges, and tea-staining the sentiment tag.  LOL  All well and good, except that one of the wonderful designers created a card based on the challenge that looked so similar in layout that it could appear that I simply took her design and copied it for my card...and yet my card was sitting on my work table completely done except for the sentiment tag before I laid eyes on the challenge on the site.  So I guess this is truly a case of creative minds thinking alike!

I do like this color combo, so it's back to the drawing board to make another card to enter for this week's challenge at TSTR.  It's another cloudy day here...pretty condusive to hanging out in the Korner and creating!

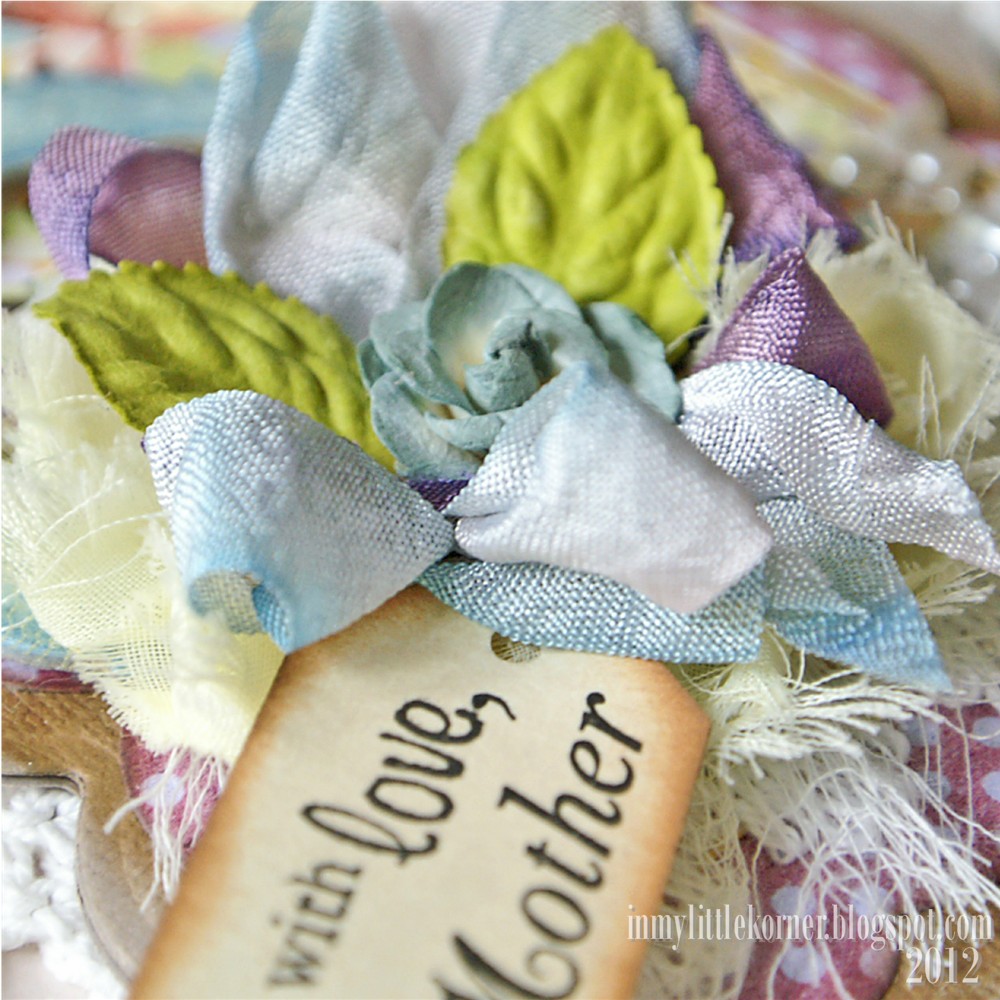
Here are some other detail pics of today's card:


Supplies:
Patterned papers: My Minds Eye A Beautiful Life collection (dotted lilac/blue); Basic Grey Kioshi
collection (floral print); Echo Park Victoria Gardens collection (yellow)
Spellbinders Labels 23 and Grand Labels 23
Chipboard frame: Tattered Angels      Laces: local craft stores      Paper flower & leaves: Prima
Fabric flower: Frogfeathers on Etsy      Butterfly punch & clear coarse glitters: Martha Stewart
White ink: Tsukineko Versa Color      Sentiment stamps: Fiskars ("with love"), Papertrey Ink: ("Mother")
Tag edge punch: EK Success       Hug Snug seam binding      Misc: cheesecloth and machine stitching
    
Have a great day...and thanks for stopping by for a visit!


Saturday, March 24, 2012

Aqua, Pink and Cream...

It's a hard color combo for me to escape...I seem to come back to it a lot, especially in spring and summer. The "pink" may range from pale baby pink to deep coral, the "aqua" may be turquoise or teal, but the combo keeps popping up on my projects nevertheless.  So, I followed the urge again, and here's what turned up.

I used the collage on this first card on a set of rose mini cards once before...for this one, I played with cropping it here and there into a square shape to fit inside the square Spellbinders doily die shape:


Supplies:
Patterned paper strips: Echo Park Victoria Gardens collection (pink damask); Basic Grey
Kioshi collection (green)
Spellbinders Lacy Doily Motifs die      Doily edge punch: Martha Stewart Eyelet Lace
Clipart: Roses, French label & frame: The Graphics Fairy      Butterfly: Dover Publications 
Pearls: Recollections      Laces: local craft stores      Paper leaves: Prima      Hug Snug seam binding


This second card uses a little Making Memories clear acrylic frame that has been in the drawer so long,  I'm not even sure whether I purchased it or received it as a gift/rak/publication goodie box.  The label says it's "self adhesive" but any adhesive that was once on the back had long-since dried up. That ended up working to my advantage, though (and is a good example of why it's sometimes a good thing not to purge embellishments just because they're "old!")

I took an "old" piece of vellum from Over the Moon Press/EK Success (can any of you remember Over the Moon Press papers? I used to love so many of their paper designs!), and stamped the sentiment using Ranger Archival Ink (the frame already had the black edge and the flower shape on it, so I stamped the sentiment to fit around those).  Then I coated the back of the frame lightly with Glossy Accents, and pressed the stamped vellum piece to the back of the frame, and let it dry.  I coated the outside edge of the clear frame with clear coarse glitter to add some texture and brightness.


Patterned papers: Crate Paper Portrait collection (floral); Graphic45 Fashionista collection/Vintage
Cherries (dot)
Bottom edge die: Tim Holtz On the Edge/Ornate      Clear acrylic frame: Making Memories
Laces: local craft stores      Paper leaf & pearls: Recollections      Sentiment stamp: Papertrey Ink
Doily: Wilton      Hug Snug seam binding      Satin ribbon: Offray    
Clear coarse glitter: Martha Stewart      Vellum: Over the Moon Press/EK Success

Have a wonderful weekend...and thank you for stopping by to visit!

Wednesday, March 21, 2012

Hello, Friends...

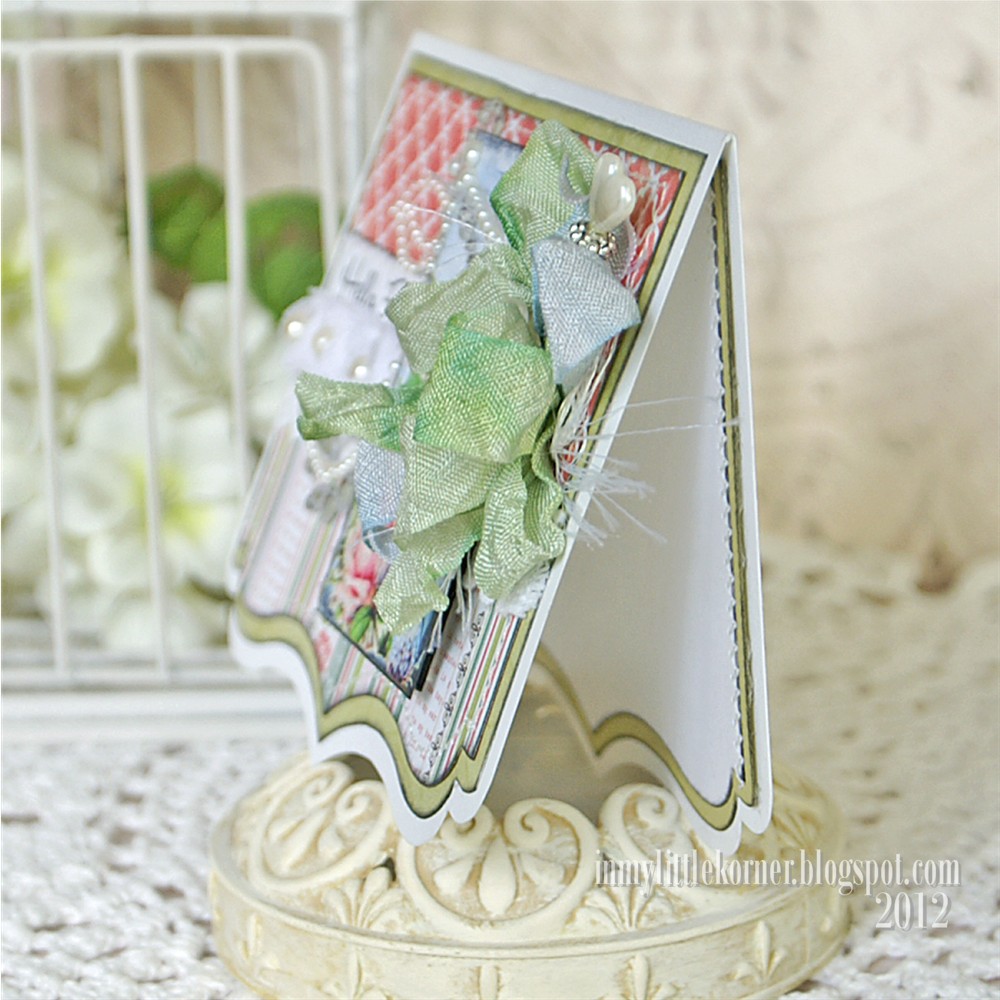
I've wanted to play with this Spellbinders birdcage die for quite a while...but for some reason it just didn't happen until now, and I'm not really sure why.  After cutting it from black textured Bazzill and dry embossing it, I lightly applied some gold accent paste and a few dark brown pearls for texture.  I decided to put flowers inside the cage, because, well, I'm apparently addicted to using flowers on my cards (just in case you haven't ever noticed. LOL).  I intentionally left off any sentiment, but I think it will be a wonderful birthday card one of these days, and attaching a sentiment tag off the bow is an easy add.


Supplies:
Patterned papers: Echo Park For the Record collection (black dot & teal pattern);
Crate Paper Blue Hill Collection/Cloud (teal dot)
Spellbinders Bird Sanctuary Shapabilities      Gold Paste: Viva Inka-Gold/Old Gold color
Spellbinders Labels 8 die      Pearls: Recollections      Hug Snug seam binding
Paper flowers: Viola Mahr      Fern & Leaf punches: McGill

This next card uses another of the little mini-collages I made using clipart from The Vintage Workshop blog and Karen at The Graphics Fairy:


A view of the inside...

Supplies:
Patterned papers: Echo Park Victoria Gardens collection (patterned stripe and coral);
Pink Paislee Butterfly Garden collection (green solid)
Edge die: Tim Holtz On the Edge/Brackets      Cotton lace: LittleRedCottage on Etsy      Pearls: Recollections
Clipart:  Floral: The Graphics Fairy   Postcard background text: The Vintage Workshop blog
Pearl & crystal flourish: Prima      Mini rose & tulle trim: Maya Road      Hug Snug seam binding
Sentiment Stamp: Hero Arts      Handcrafted stick pin using Maya Road heart stick pin base

I'm heading off tomorrow to my Mom's to help her celebrate her birthday...and taking up an ice-box cake (because we're all ignoring any diets tomorrow-LOL).

Thanks for stopping in!


Monday, March 19, 2012

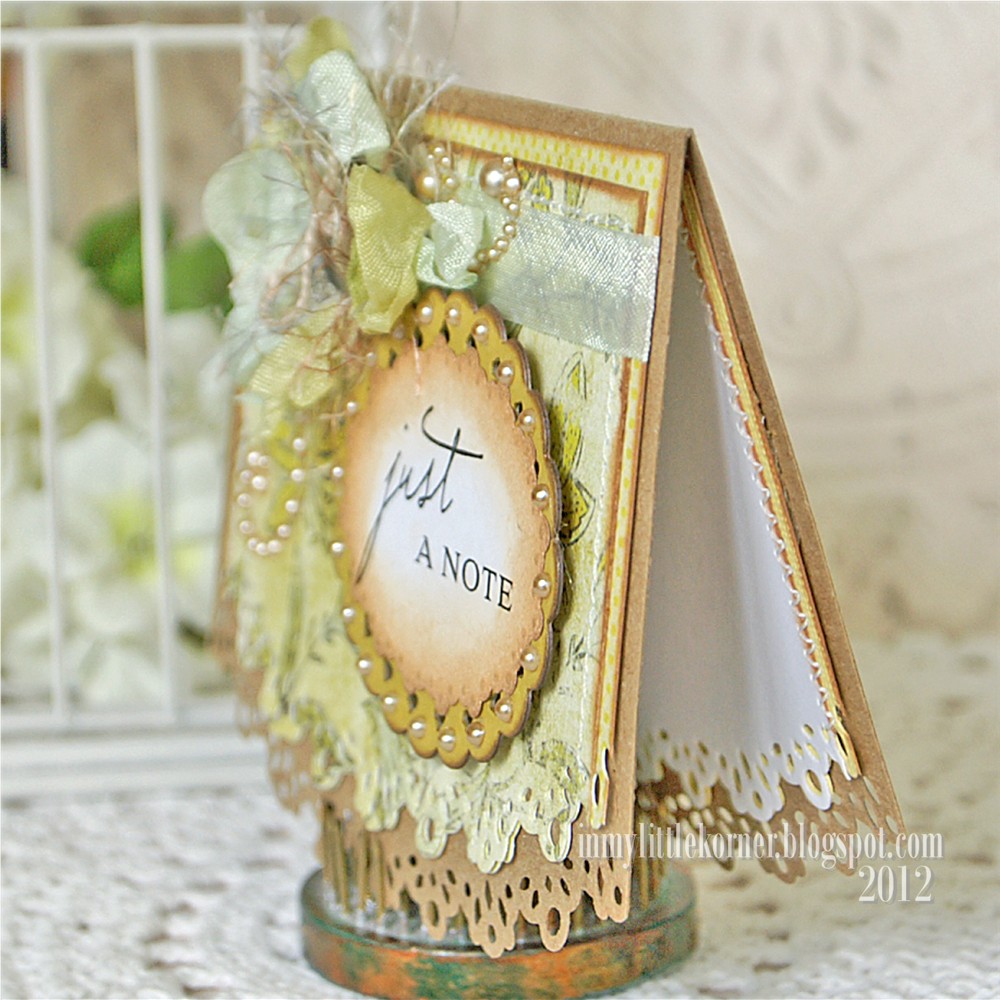
Just a Note...

It was a fun week in the Korner last week...rainy days must be one of my creative cues! 

I gave myself a little challenge during the week, and that was to make up two cards using only papers left over from other previous projects (except for the card base itself), something I haven't done in a long time.

When I finish a project, any leftover piece that's 3"x5" or larger goes into a 2-1/2 gallon Ziploc bag...I have 4 of those bags leaning against the Iris cart next to my work area.  One is for cardstocks in neutral colors, one for cardstocks in ROYGBIV colors, one for patterned papers ( patterned paper leftovers from 6x6 pads go back into that pad, not into the large bag...I used only leftover pieces from any of my 6x6 pads for this), and one for chipboard scraps.

I write the vendor and collection name onto the backs of the patterned paper leftovers so I can credit them later, or even use them to match up when I'm looking for coordinating papers.  You'd be surprised how many times I dip into those bags in the process of making cards on a regular basis to match or mat papers I've chosen to use.

I started out keeping my "scraps" in a smaller basket, separated by dividers marking them by color.  But I found that when I cut into a 12x12 piece of cardstock, for example, and didn't use the whole piece, I didn't want to put the remainder back with the full size papers, yet it was too large a piece to fit into the file box without cutting it down further.  So I migrated to the large bags that I could close securely to accomodate the larger pieces, too...and it's worked out well.

OK, enough chatter...here are my "from the bags" cards...hope you like them, too.


Here's what I do on the insides of cards with an edge like this...

Supplies:
Patterned Paper: Pink Paislee Queen Bee collection      Edge Die: Papertrey Ink Edgers 2
Journal spot: Martha Stewart label      Journal Spot background: Spellbinders Beaded Ovals die
Pearls: Recollections      Sentiment stamp: Papertrey Ink      Hug Snug seam binding 

Next up, a very feminine friendship card...


Supplies:
Patterned papers: BoBunny Ella Toile ("b" side); Prima IOD Coquette/Jolis (floral); MyMindsEye Stella Rose/Hazel collection (green pattern); Echo Park Victoria Gardens collection (pink damask)
Ephemera piece: Pink Paislee Buttefly Gardens Ephemera pack      Fabric flower: Frogfeathers on Etsy
Fabric & paper leaves: Prima      Spellbinders Labels 8 die      Pearls: KaiserCraft and Prima
Doily: Wilton      Handcrafted stick pins      Pearl & crystal strip: Recollections      Flower laces: local craft stores
Scalloped lace: LittleRedCottage on Etsy      Sentiment stamp: Hero Arts      Vintage button from stash  

Happy Monday...thank you for stopping by!   


Related Posts Plugin for WordPress, Blogger...