Sunday, June 7, 2015

Watercolor Blog Hop - You Are Fabulous...


I know what you're thinking...what's she doing here today? :)  Well....Pretty Pink Posh is having a fun...and I mean fun...watercolor blog hop through tomorrow evening, and I had to join in!

If you like watercolor cards, you need to follow that link I just gave you above and take a look at the entries so far. There are already over 300 beautiful cards to feast your eyes on!

Here's my humble addition to the hop...a clean and simple friendship card...


And a few detail shots, starting with the little glittery butterfly in the corner...


And finishing with the glittered heart at the bottom...


Supplies:
Stamps:   Stampendous "Ranunculus Field";   Altenew "Super Script" ("you are")
Color Mediums:   Sakura Koi watercolors;   "Stardust" Stickles
Dies:   Papertrey Ink "Heart Prints";   Technique Tuesday "fabulous"            Punch:   Martha Stewart "3-in-1 Butterfly"
Miscellaneous:   Ranger Distress Glitter  "Rock Candy,"  colored gem,  twine,  cheesecloth


Thanks for visiting - I'll be back tomorrow with a Mixed Media Monday share!


Thursday, June 4, 2015

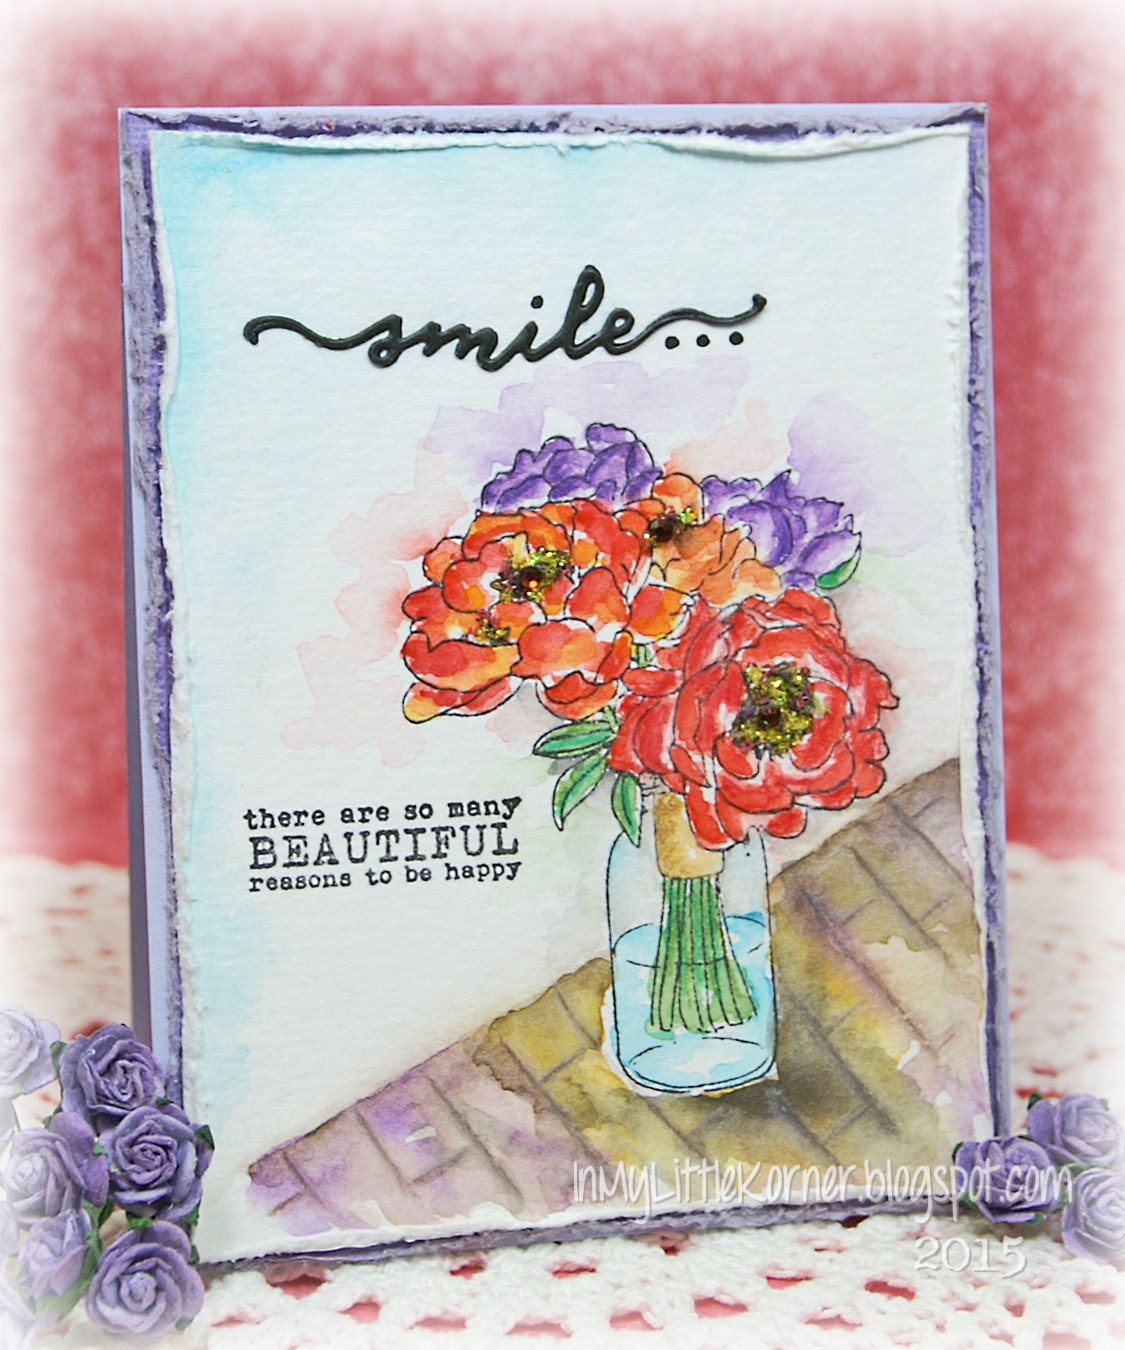
Smile...

It's another watercolor day here on the blog, and in contrast to Monday's technique and photo-heavy post, today's is clean and simple, like the card I'm sharing.

I had a couple different Unity Stamp Co. stamps that I wanted to combine and once they were finished, I realized I had the perfect Penny Black die to complement the sentiment...


I played with the flower centers by adding a tiny touch of Heather Flower Soft, then finishing the center accents with Yellow Stickles and a colored gem...


Supplies:
Stamps:   Unity Stamp Co. "As We Go Along" and "Summertime Bouquet"
Dies:   Penny Black "Heartfelt" ("smile")
Color Mediums:   Grumbacher transparent watercolors;   Faber Castell Polychromos pencils;  "yellow" Stickles
Miscellaneous:   "Heather" Flower Soft,  small colored gems


Thank you for visiting today...have a wonderful weekend!


Monday, June 1, 2015

Art Journal - Be a Butterfly

Happy Monday, everyone! This week is starting with a Mixed Media Monday art journal page share...and it's something a bit different for me. My art journals are little places to experiment and play, so not every layout is a "work of art"...more like a "work of wonder" as in "I wonder if this will work..." :)

I wanted to do something with my Indigo Blu/Limor Webber "Ink Splat Butterfly" stamp, and I wanted to pair it with a new Unity Stamp Co. butterfly quote stamp. But since I'd just about finished with another bright and sassy and experimental butterfly layout in my journal (you'll see that one next week), I wanted this one to be a bit moodier. (hmmm...wonder if the fact I was watching recorded "Falling Skies" episodes had anything to do with that...ha!)

Here's the finished layout in my small Dylusions journal...


The use of a lot of embossing powders, and paints with iridescence mixed with the flat paints and inks, gives this "moody" page a touch of brightness...here's a side view of the reflective surfaces...


Want to see how it evolved? The first step was to stamp and emboss the butterfly...I chose a couple different colors of embossing powder..so far, so good. Then I got an idea, so I masked the butterfly before applying the modeling paste through a brick stencil...


I wondered if this last step would give me the impression of looking through a hole in a brick wall at a butterfly flying in the distance. So I went ahead and colored the brick wall using a few different Lindy's Stamp Gang Magicals, and shading with a few more...some flat, some iridescent...keeping the mask over the butterfly stamp as I painted the bricks and mortar...


Then I painted in the background colors with more Magicals...blue, orange and pink in the sky area, and more green and blue at the bottom. When I added some darker shading colors around the edge of the "hole," I started to see where I was headed with the layout. Mind you, I did think twice when I got finished with this step...I kind of liked the bright and happy feel to the page. So I let it simmer in my head overnight, while I did other things and wondered if I really wanted to take this in the direction I originally envisioned...


When I came back to it the next day, I looked at the wall and thought "no brick wall with a hole in it is going to look that neat...it needs some graffiti on it."  So out came more embossing powders, and a Ranger Fudeball pen, and a script stencil to get me started with my letter shapes, and by now the page had a mind of its own and I was just going with the flow. I used some acrylic craft pigments to draw in some stems and tiny orange and magenta flower petals and leaves along the bottom edge..


At this point, all I needed to do was add some more shading, play around with those circles in the upper left, add some more texture with modeling paste, gussy up the butterfly, and add the sentiments...and that's how it ended up as in the top photo!

Here's a less reflective closeup of the embossed and stamped and shaded circles in the top left...


I used my Indigo Blu "Rugged Edge" stamp to get the embossed edges along the top. First I embossed with a dark blue powder, then topped with a lighter jade-slate powder. Here's a closeup of the two colors...at the top, the jade-slate deepened the blue, at at the bottom you can see how it's a beautiful green-grey shade...


Over in the right corner of the layout, I wanted some more circles, but not as heavy as those on the other page. So I pulled out one of my stencils and applied modeling paste through it...texture and some of a similar element on the opposite corner. (See that light "brown" at the upper left of this pic? That's the jade slate embossing powder over the orange paint...a totally different appearance when over the other color, but the same powder!)..


And finally, a closeup of the dressed up butterfly. Using a Fudeball pen, I drew inside the blue embossed circles on the wings to give them a textured look, outlined the outside, and added a strip of rhinestones through the center...


Supplies:
Color Mediums:   Lindy's Stamp Gang Magicals:   Rizzos Rowdy Red,   Bodacious Blush,   Sandra Dee Sepia,  Gag Me With a Spoon Grey,  Pink Ladies Pink,   Pretty in Pink Pink,   Luscious Lime,   Tilt a Wheel Teal,   Orange Creamsicle
Lindy's Stamp Gang Embossing Powders:   Bonjour Butter,   Aurora Amethyst,   Tilt a Wheel Teal,   Hyacinth Blue Jade,   Twilight Jade Slate
Ranger Fudeball pen - black;     acrylic craft paints
Stencils:   The Crafters Workshop "Mini Bricks"  "Mini Halftone Borders"   "Mini Specimens";   Donna Downey "Scribble Script"
Stamps:   Indigo Blu "Ink Splat Butterfly"   "Limor Circles"   "Rugged Edge";   Unity Stamp Co. "Today is a Lovely Day"
Art Mediums:   Golden modeling paste             Miscellaneous:   Stabilo All pencils-black & brown,  clear crystal gems


Thanks very much for visiting today...I hope your week is starting with a smile!


Thursday, May 28, 2015

Hot Summer Pink...

Hello again! The other day as I was putting away unused supplies and bits and pieces, I found an A2 sized piece that I had cut a round aperture into, and run through my brick wall embossing folder, then set aside when I changed my mind on the direction of the project I was working on. Of course, in the midst of my mini cleanup, I had an idea what I could do with the piece, so instead of continuing to straighten things up, I got to work making a mess again! :)

The round aperture I had cut turned out to be the right size for me to use one of my LaLa Land Crafts stitched circle dies to create a frame...and then the ideas kept coming, so I kept working...and this is the end product...


I used the same green ink that I used inside the aperture to color the edges of the white leaves and berries. It was a happy find to see that the lilies were the perfect color to go with the small hot pink roses...


The little punched butterflies were accented with pink Stickles and tiny pearls. I still get use from many of my older punches - it's one of the reasons I still hold on to many of my basic tools...you never know when they'll be perfect for a current project, and they're faster to use than setting up my electronic cutter for a last minute accent...


I pencil-traced the aperture onto the base of the card, and inside it I added some stamped leaves and pink stems that would coordinate with the flowers I planned to place on the top layer around the outside of the framed circle. Then I used foam tape to attach the top embossed layer to the card base...


And lastly, a couple closeups of the embellishments at the bottom of the card...


Supplies:
Embossing Folder:   Sizzix/Tim Holtz "Bricked and Woodgrain Set"
Dies:   LaLaLand Crafts "Stitched Circles" and "Berry Flourish"
Stamp:   Simon Says Stamp "Summer Garden"             Punch:   Martha Stewart "3-in-1 Butterfly"
Flowers:   Wild Orchid Crafts (roses);   local craft store (lilies)
Pearls:   Recollections            Pearl stem:   local craft store
Miscellaneous:   "Pink" Stickles,  white twine


Thanks so much for stopping by for a visit today!


Monday, May 25, 2015

Happy Memorial Day...

Happy Memorial Day Monday, everyone! To those who read my little crafty blog and have loved ones who were lost while in service to our country, I thank you for their service and selflessness, and sympathize with your loss and your sacrifices.

I'm starting this week off sharing a very frilly and softly-shabby all-occasion card, filled with flowers and fun embellishments...


It all started with the background paper...a very soft, buttery yellow and pale gray wood pattern.  It's accented with white lacy touches and pale yellow roses, offset with the deeper turquoise and purple roses for a burst of color among the pales.  

The small frame in the center is made with white air-dry clay that's painted with Old Silver and Hematite Viva Inka Gold paints to give it an aged, metallic look...


A few roses are nestled down inside the frame on top of some scrunched cheesecloth...the rest accent a couple corners of the frame...


Here's another closeup of the frame detail. I first applied the Hematite (dark grey-blue) paint to the clay frame, and after letting it dry for just a couple minutes, finger-painted on the Old Silver (which is the buttery, pale yellow shade that was a perfect match for this card). After the Silver was applied, I rubbed the edges until some of the Hematite peeked through, making it look old and worn...


Supplies:
Patterned paper:   My Minds Eye "Bramble Rose"
Dies:   Cottage Cutz "Tea Time Doily";   My Favorite Things "Royal Leaves"
Stamp:   Unity Stamp Co. "chickenwire"             Clay mold (frame):  Martha Stewart
Flowers:   Wild Orchid Crafts (purple, yellow roses);    LayoutsFromTheHeart on Etsy (dk. teal roses)
Pearls:   Recollections            Lace:   TheFunkieJunkie.com            Glass Glitter:   Stampendouc "Oceanic"
Miscellaneous:   cheesecloth,  white twine,  white air dry clay,  Viva Inka Gold paints - "Old Silver" and "Hematite"


Thank you for visiting today...I hope your week is starting with a smile!


Thursday, May 21, 2015

Just Happy...

Summer temperatures have me in the mood for lighter, softer colors mixed with bright white.

For today's card, I played again with what I call "altered edges." I used a die designed, I think, for straight edges, but I put them on a diagonal slant to add some fun layering to the front of the card...


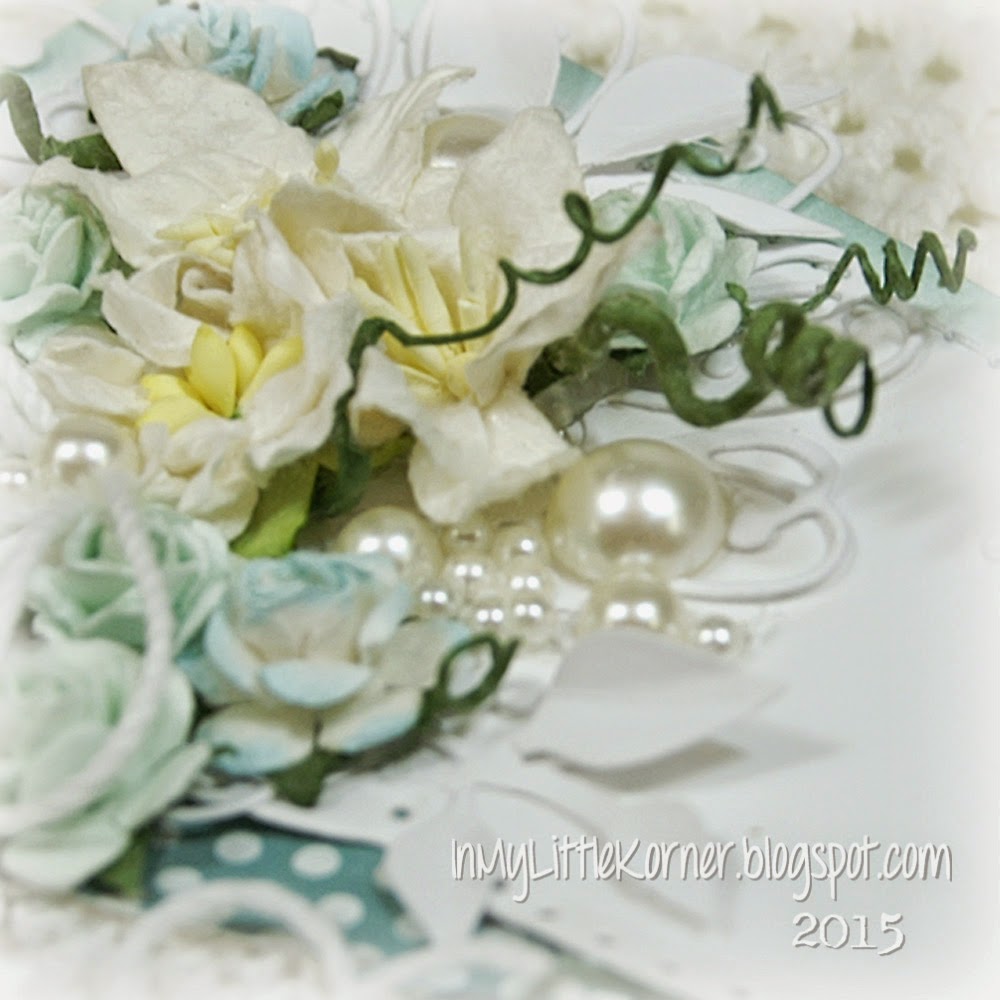
At the top, a flower cluster of cream and white lilies, and aqua and white mini roses, sitting atop a loopy diecut doily, accented with lots of loopy twine bows and pearls...


Over on the side, another smaller version, with just a few aqua flowers...


And a sentiment that will work for a variety of occasions, as the need arises...

Supplies:
Dies:   Spellbinders A2 Scalloped Borders Two;   LaLa Land Crafts Filigree Corner;   Memory Box Quinn Flourish;   Sizzix Flowers Branches & Leaves
Lace:   TheFunkieJunkie.com            Flowers:   Wild Orchid Crafts            Pearls:   Recollections
Sentiment stamp:   Simon Says Stamp "Handwritten Greetings"
Miscellaneous:   white twine 


Thanks for visiting today!

Related Posts Plugin for WordPress, Blogger...