Monday, August 29, 2011

Boxes and Baskets and Stuff...oh my...

I'm still cleaning and purging the craft room closet.  I loaded up on baskets on sale at the craft store, and I started pulling, and purging...in spite of the fact my new Spellbinders goodies were sitting there saying "it's my turn!" I did spend some time organizing my new dies and putting them onto magnetic strips on chipboard for storage- until I ran out of chipboard. :)

Then it was back to the closet...and now I was stressing because it wasn't going as quickly as I had wanted. So...I decided to stop stressing and have fun with the project.  It's still slow going now, but I am having fun with it.

Here's one of my fun discoveries.  A few years ago, Creative Imaginations put out a line of boxes and albums called "bare elements" (or "be."). I found some down at the bottom of the closet, neatly tucked behind a bag of shipping supplies.  One of them was this hat box. So, in the spirit of fun, I stopped the cleaning and started the decorating of the hat box.  I have this obsession with boxes - and decorating them.  I take boxes that used to contain just about anything, and if it has a lid, it's decorated before I fill it with "stuff." 

Normally I decoupage papers onto every surface of the boxes, but this time I decided to leave the inside and the very bottom the original white color and cover them with two coats of matte decoupage medium as a protective measure. The paper on the top is Sassafrass, on the sides is K&Co and Crate Paper - the large flower and pretty fabric leaves are Prima, and the rest of the laces and ribbons are all from the stash.


Have a great Monday!

Wednesday, August 24, 2011

A Fun Surprise...

I've started my closet clean/purge project, and it's not easy to stay on track. But there's a fun reason why.

Last month, I blogged about this and late Monday afternoon two boxes from Spellbinders arrived on my front doorstep (sooner than I had expected them to arrive-that was the fun surprise!). One box contained a pretty, new Grand Calibur machine, and the other box was filled with newly released die sets...so many die sets (are you picturing that cute teacher on the Target commercial as she says "so much glitter?"). I'm still gobsmacked that I won this! 

So-back to my dilemma. Have you ever tried telling a crafter they have to clean before they can play with new toys?  Didn't work well for my mom when I was young, and it still doesn't work so well now-even when I'm the one telling myself! LOL  So there's a little bit of cleaning time, a little bit of play time...a little of this, a little of that going on in the little "korner" this week.

In the meantime, here are a couple more cards - it's still pretty hot here, but I'm dreaming of cooler autumn temps already and having fun with fall colors!


Supplies:
Patterned Papers: K&Co Julianne Collection      Flower: Prima
Handmade stick pins & paper leaves      Cotton laces: Etsy & local craft stores
Chipboard Flourish: Fancy Pants      Pearls: KaiserCraft


Supplies:
Patterned Papers: Jillibean Soup Dutch Mustard Collection
Ephemera Card: Glitz Designs What Nots Laced with Grace
Picket Fence Die: Papertrey Ink      Laces: Etsy      Pearls: Prima & KaiserCraft
Hand dyed Hug Snug seam binding and rayon twill tape

Hope your week is going well!


Monday, August 22, 2011

Hi, There!

I have a few more cards to share with you today, and a couple more will post in a day or so after I photo them.  I doubt I'll have much time to create new cards this week.  I'm about to embark on a project that, once I'm into it, I may regret ever starting.  But if I put it out there in the Internet world, I'll hold myself accountable for "diving into the deep."

Years ago when we decided this small corner room would be my craft room, my dear husband reworked the closet to contain lots of shelving and specialized storage needs for my various craft supplies - fabrics, paints and assorted accessories, flower arranging supplies, needlecraft supplies, etc.  Then he built a beautiful large oak cabinet for my scrapbooking and stamping supplies, with lots of drawers, cabinet space, and laminate work surface, including two pull out work surfaces in addition to the cabinet top.  I had a LOT of room, and everything was in its place.  That was then.

Over the years, like all good crafters, I've accumulated more.  I've purged my supplies and donated to various charities that put them to great use, but somehow these supplies keep growing. I like to say they're like the Tribbles on the old Star Trek episode (yes, I realize I'm really dating myself here...LOL).

So this week, I'm going to do a MAJOR purge and reorganization of all the supplies hiding in that closet. And it's scary, because there are some things I've looked for in the past few weeks, and I KNOW I have them, but I can't find them. I'm sure they're hidden in the closet, daring me to find them again.

So..."I'm goin' in..." I'm going to schedule a post for Wednesday after I photo the last two cards...and if you don't see me back here next Monday, send help - apparently I'll have buried myself under a mountain of supplies that multiplied as I pulled them from their hiding places!
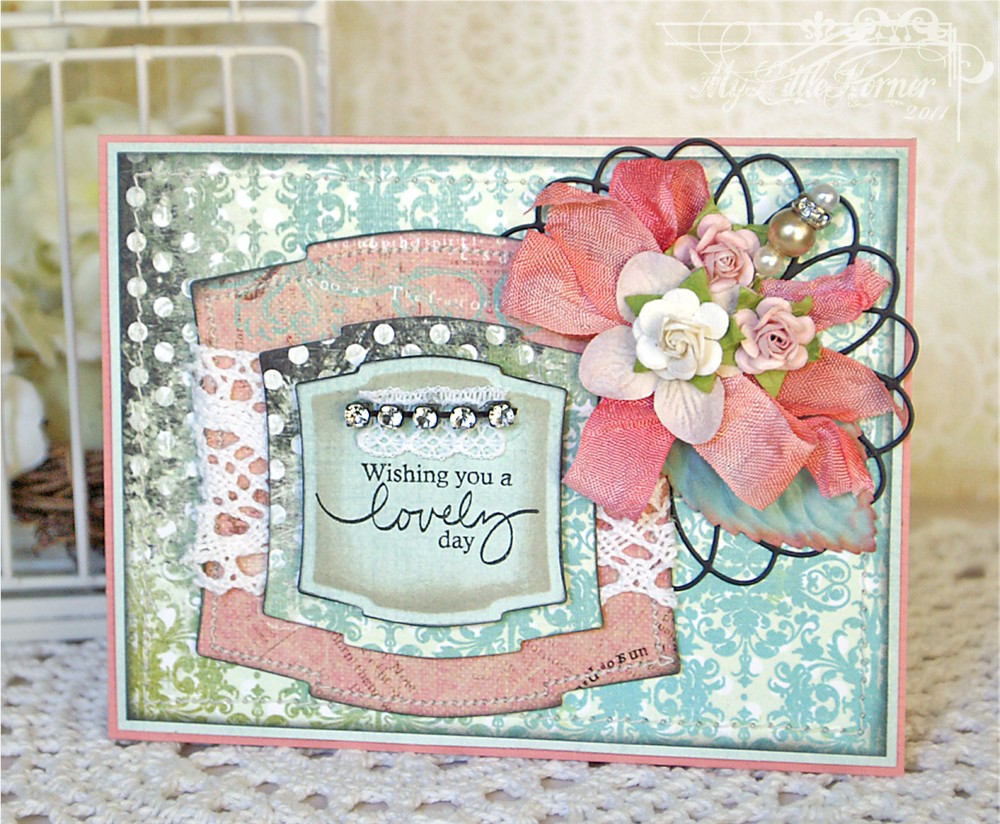

Supplies:
Patterned Papers: Echo Park Victoria Gardens Collection, BasicGrey Basics White
Pearls & Leaves: Prima    Sentiment Stamp: Papertrey Ink
Chipboard Frame: Tattered Angels    Hug Snug seam binding
Fabric flower and Laces: Etsy   
Dies: Edge die-Tim Holtz Ornate On the Edge;  Large medallion: Tim Holtz Mini Baroque;
Sentiment block: Spellbinders Fancy Tags (1)
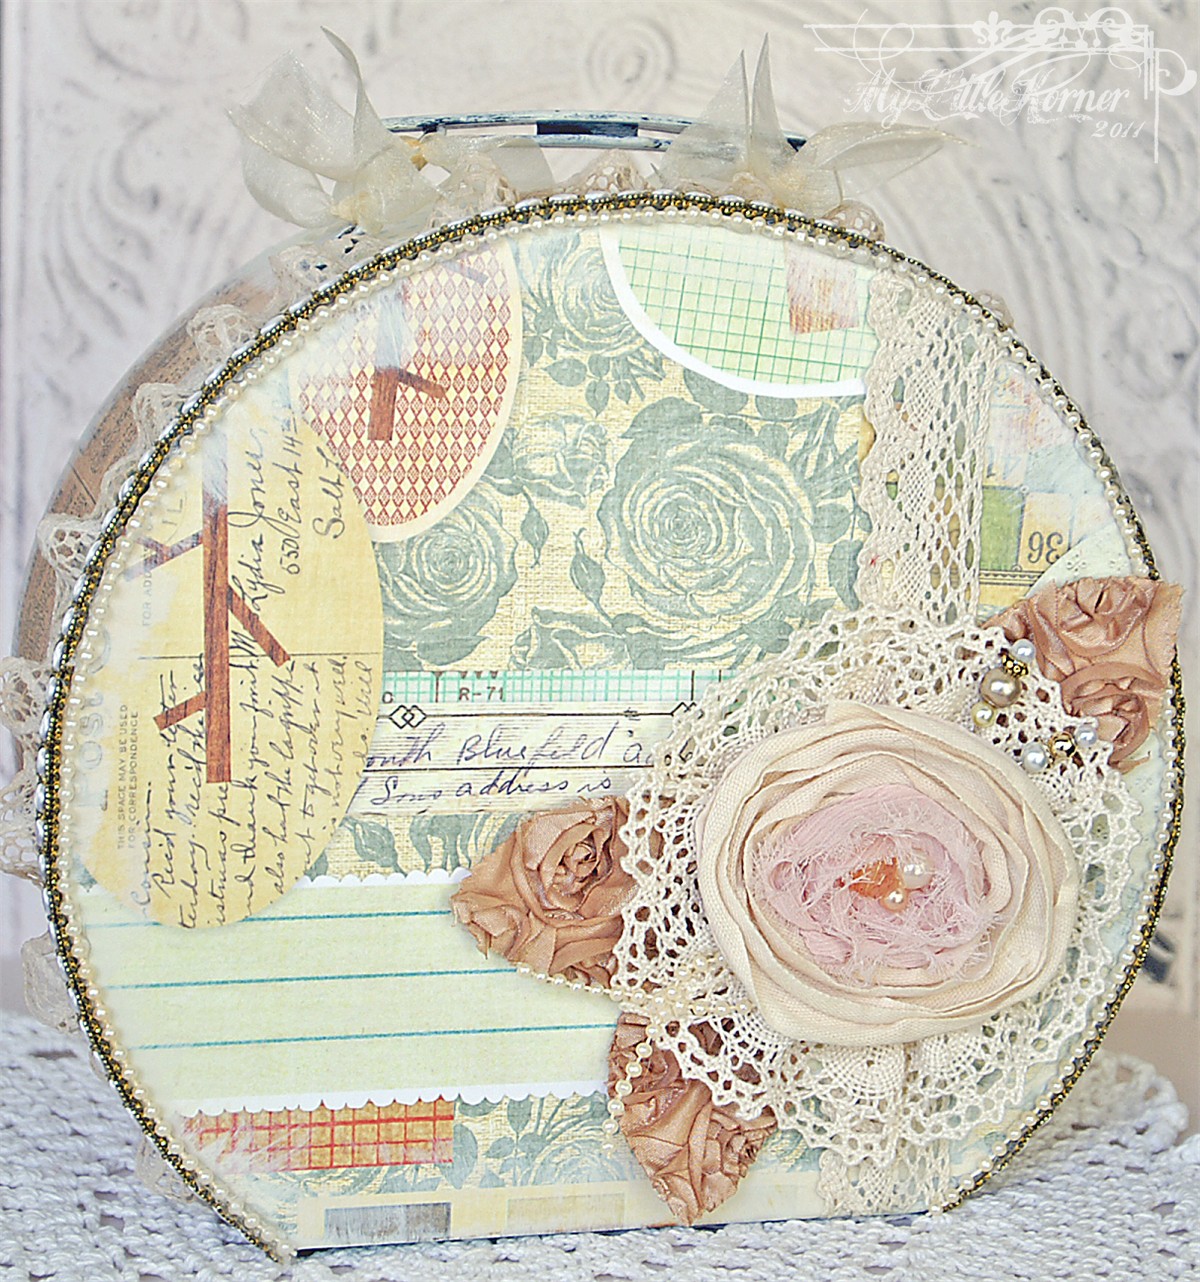


Supplies:
Patterned Papers: Melissa Frances 5th Avenue Collection
ATC Ephemera Card: Pink Paislee Butterfly Garden Collection
Flowers, leaves, lace, pearls: Prima    Scalloped kraft envelope: Maya Road
Stamps: Hero Arts (sending smiles), Tim Holtz (post card)
Burlap: local craft store    Handmade stick pin


Supplies:
Patterned Papers: Kaiser Craft Miss Nelly Collection
Postcard: Glitz Designs    Mini roses: Prima    Resin scroll: Melissa Frances
Chipboard frame: Spellbinders Labels 20    Sentiment Stamp: Papertrey Ink
Hug Snug seam binding    German glass glitter: Etsy    Lace: local craft store

Have a great week!

Monday, August 15, 2011

Pinks and Greens...

Those seem to be the "go to" colors for my mojo lately, so I just go with it. Here are a couple of the cards I worked on this weekend.

This first card is true to the vintage shabby chic inspiration of that sweet Crafty Secrets image of the two little girls sharing a secret. I'm thinking it might even make a fun thank you card for a friend.  I used the Papertrey Ink Seed Packet Frame die as a frame for the image.


Supplies:
Patterned Papers: Graphic 45 Once Upon a Springtime Collection (pinks),
Echo Park For the Record/Fabric Store (green)
Seed packet frame die and stamp: Papertrey Ink    Vintage Image: Crafty Secrets "Vintage Photos"
Sentiment Stamps: Technique Tuesday/Ali Edwards ("you are the best"), Papertrey Ink ("my sweet friend")
Laces: Etsy    Mini Rose: Prima    Pearls: Recollections & Kaiser Craft    Hug Snug Seam Binding

This next card is for my personal stash. I prefer to have birthday cards ready to go, mainly because I have a tendency to ignore the notes I leave myself about upcoming birthdays, and then have to rush to make sure I have a card in the mail in time to make the special day! :)

I used a Lettering Delights frame svg (Oblong Frames No 9) for the shape for this card, and used Make the Cut to turn it into a card base with the slots and a corresponding solid card base as a liner. The vintage pharmacy label was a free download from The Vintage Workshop blog . 


Supplies:
Patterned Paper: Imaginisce    Vintage Label: The Vintage Workshop blog
Laces: Etsy and local craft store    Mini paper rose and leaves: Prima   
Pearls: Recollections    Sentiment Stamp: Papertrey Ink
Pink Fabric Rose: Making Memories    White rose ribbon: local scrapbook store

Back to the pinks and greens...and blues...and oranges...and more. 


Friday, August 12, 2011

Friday Fun

I hope to spend a good part of this weekend crafting away in my little corner...with luck, my creative mojo will cooperate so I can spend the time productively!

For now, here's the latest card I finished this week.  It's a shabby chic little number using some K&Co papers and lots of lacy accents.


Supplies:
Patterned Papers: K&Co, Kaiser Craft
Alencon lace, Pearls, & Paper Rose: Prima      Rosebuds: Etsy
Paper Doily: Martha Stewart      Mini tag: Maya Road
Sentiment Stamps: Papertrey Ink      Hug Snug Seam Binding

Have a great weekend!

Thursday, August 11, 2011

And Last But Not Least...

I'm back today with the last three cards I made up using the Green Tangerines August Card Kit Add-on.

You can probably tell this first card uses up a lot of the tinier scraps left from the other cards.  After embossing and edge-punching the bottom of a piece of the white cardstock, I simply double-punched two different small butterfly punches, stacked them to look a little more "fluttery" and used machine stitching around the card and through the centers of the butterflies to give a bit of illusion of movement.  Their heads are the golden pearls from the kit, and a small stamped sentiment block adds the finishing touch.


On this card, I used the Tim Holtz Baroque Alterations die (available at the store) to cut the large floral medallion. The last pieces of white lace from the kit were just enough for the trim strip, and a gathered base under another of the white flowers (sprayed with coral mist) and a tiny white rose topper.  Both stick pins from the kit were used, but for fun, I added some clear coarse glitter to the green stick pin. The cardboard heart is simply hand cut from a piece of a torn up box...I dry-brushed it with white acrylic paint, then sanded some of the paint off to distress it, and added clear coarse glitter in the "valleys". The little clear flower from the kit sits prettily on that shabby heart.


And last but not least, this final card is a nod to fall. The kit contains a 7Gypsies tag - each kit's tag may be just a bit different...in mine was the "good fortune" tag. I chose to cut the tag down just a bit, and punched the bottom edge with an EK Success edge punch (Parisian). I matted the tag to a piece of cardstock that I embossed with a Sizzix "diamond" embossing folder (and lightly inked with Tea Dye Distress Ink), and matted those two again to a larger tag-shaped piece of brown cardstock, punched on the bottom edge with the same EK edge punch. I added a Chinese good luck coin from my stash, and a few Hug Snug bows to the top of the tag. And just to be different, I matted this tag onto a 4-1/4" square card, so the top of the tag extends above the top of the card (the total height of the card is 5-1/2", so this card fits into a standard A2 sized envelope.)  The last piece of tan lace from the kit runs across the bottom of the card...that little orange rose is one of the white roses from the kit, inked with orange chalk ink. I know we've had a cooler than usual summer here, but I can't wait for fall temps to arrive!


And that's the conclusion of the card pics for this month's Green Tangerines kit.  I hope, regardless of your personal style of cardmaking, you've found something here that spurs your own creativity.

It's been a busy week, with not as much crafting time as I'd have preferred, but I do have one more shabby chic little number to share with you tomorrow.  See you then!

Wednesday, August 10, 2011

Hello, Wednesday!

It's the middle of the week...and I'm back with a few more cards to share with you.  I'm still replenishing my "ready to go" basket of cards, and it was time to add a thank you card (or two) to the ready...this is my latest addition.

I used the Spellbinders Fleur de Lis Squares die to make the shaped card, and it's just big enough to write a short note of thanks inside.


Supplies:
Die Cuts: Spellbinders Fleur de Lis Squares (shaped card),  Pink Paislee Butterfly Gardens Collection (birds)
Pearl and Leaves: Recollections    Chipboard frame from stash    Bronze German glass glitter from Etsy

Here are a few more sample cards from the Green Tangerines August Add-on Card Kit. I call these "the bright summer group."

On this first card, I took the orange doily sticker from the kit and backed it with a lightweight die cut chipboard scalloped circle that I dry-brushed with white acrylic paint. I used the American Crafts leafy stamp from the Sentiments set that was part of an earlier month's kit, added a little brush flower stamp in orange, a few little white pearl accents, and a stamped sentiment to the die cut. 


This next card is guaranteed to wake you up if you've dozed off reading this - LOL.  That yellow cardstock  is beautifully bright! But it's the same bright yellow that's in that pretty rose floral paper in the kit, so I gave it a go. I cut the pink doily sticker in half to pick up the pink in the patterned paper, and once again, cut a strip of the white lace from the kit, and lightly gathered it into a circle under the little flower. If you use a smaller strip of lace to gather, the edges will "cup" upward instead of forming a more free-form effect of the larger pieces (and yep - that's another all-white flower...I colored the tips with Pink Petunia Versa Magic chalk ink and the center with Tea Leaves Versa Magic chalk ink).  I used two of the little clear flowers as "stick pins" behind the flower and bows.

Lately, I've taken to punching decorative edges on all my little tags - it adds a fun little bit of interest, and you'd be surprised how many of your edge punches will work on these bitty tags!


You don't have to look too closely to see that the papers in this next card were the remainders of the papers I used in the first card above. I usually challenge myself to make "leftovers" work in a meaningful way.  The little watermelon button card is from Pink Paislee's Hometown Summer Chipboard Pops - not part of the kit, but available in the store.  I knew white machine stitching wouldn't show up as well as I wanted here, so I hand-drew the line detail with a Uniball Signo Broad white pen, and accented them with little black dots for a fun detail. (The little sentiment tag is printed on my printer.)


Have a great Wednesday!


Tuesday, August 9, 2011

Wishing You A Lovely (Tues)day...

I find myself gravitating toward my pink and aqua patterned papers & embellishments these days - something that I'm sure will change as the summer season draws to a close in a month (or so). But for now...


Supplies:
Patterned Papers: Glitz Designs (aqua), Prima (pink)
Die Cuts: Spellbinders Labels Two (sentiment blocks), Memory Box Whimsy Circle (black doily)
Flowers: Prima      Laces, Rhinestone strip: local craft store    Sentiment Stamp: Papertrey Ink
Handmade Stick Pin      Hug Snug Seam Binding dyed with Tim Holtz Distress Inks

Here are what I call "the blue group" cards from the Green Tangerines Add-on Card Kit for August. I loved the tan lace in this month's kit...when you cut a 4-scallop piece and gather it with a basting stitch, it looks just like you hand-crocheted a tiny doily, which makes a perfect base for one of the small white mulberry roses.  (The Crafty Secrets vintage image is from a previous GT card kit.)


On this next card, I took some of the large white flowers and masked the centers with die-cut cardstock scalloped circles before spraying the tips of the petals with the two different Glimmer Mists included with the August layout kit.  The yellow centers are colored with a couple different yellow Marvy LePlume markers so they'd blend with the background yellow paper.  I lightly sprinkled some coarse clear glitter over the finished flowers, and layered them using 1/16" foam dots (I use the ones by Best Creations). The green doily is one of the three doily stickers included in this month's kit...I adhered it to a chipboard circle that's slightly smaller than the doily sticker, and pop-dotted that over the ribbon.


And last but not least...what I call CAS (clean and simple). My EK Success Deco Scallop edge punch got a workout on this card.  The flower, butterfly, and lace strip are from the kit, but I pulled the pearl spray and sentiment stamp from my stash for the finishing touches on this colorful card.


That's it for today.  I'll be back tomorrow with a little cutie that I finished just today, and some more of the GT kit card pics. Have a great day!


Monday, August 8, 2011

A Couple Kit Cards to Share...

The Green Tangerines August Kit layout and card samples are posted now in the kit club gallery. I have so much fun making samples for the add-on card kit!  Throughout this week, I'll feature a few cards at a time, and note any special techniques I used - starting with today's short post.

My usual, personal style is more "fussy" and dimensional, with a friendly nod to shabby-chic; but with the kit samples, I try to incorporate a wider variety of styles from CAS (clean and simple) to fussy-and-fun, and everything in between.

The August layout kit included two small misters filled with Glimmer Mist.  I used the lighter aqua mist for the fabric envelope on this first card, and on the Hug Snug seam binding for the bow.  I used the Sizzix Bigz Scallop Envelope die (available at the store) and aida (crosstitch) cloth to cut the envelope before misting it.

The white flowers in the card kit are very versatile, and rarely stay all-white when I'm done with them! On this card, I edged the large white flower and dipped the tips of the small white roses with Fired Brick Distress Ink.  A piece of the same lace that runs across the front of the card was gathered with a basting stitch for a touch of "frilly" between the layers of white mulberry flowers.

The Technique Tuesday Ali Edwards sentiment stamp (in the card kit) fit perfectly at the bottom of this card. (The doily stamp at the top wasn't part of the kit, but it's available at the store...it's the Maya Road Doily Borders stamp.) 

Even though it follows my "nod to shabby chic" usual style, this next card is one of the few I've ever made that's monochromatic.  I have tried to make these before...but unlike with this card, I couldn't leave well enough alone and ended up adding spots of colors to my previous attempts. LOL  I let the handwritten look of the condolence sentiment stamp (part of the same set as the stamp used in the card above) determine the style of the card.  But a condolence card should have some sort of formality to it, so I hoped the monochromatic color scheme would accomplish that.

I made up a few tiny white felt rolled flowers for the base under the white mulberry paper flowers from the kit, and added a few white pearls from my stash for accents.

I'll be back tomorrow with more cards!

Friday, August 5, 2011

Still feeling like summer...

We've had a much "milder" summer than usual here this year. Normally, we'd have had many 100-degree+ days by August - this year I think we've had only 5!  But it's still hot - just not *as* hot...and it's still summer, even though some of the neighborhood children and teens start back to school in another week.

So I made up a summer-y little card the other day, with lots of lacy accents and feminine through and through - just for my "ready to go" basket of cards.

Have a fun weekend!


Supplies:
Patterned Papers: Echo Park Victoria Gardens Collection 
Button Card Stamp, Dress Form Die, Sentiment Stamp: Papertrey Ink
Pearls and Crystals: Prima and Kaiser Craft
Hug Snug Seam Binding dyed with Tim Holtz Distress Inks
Paper Doily, Lace, & Flowers: local craft store

Monday, August 1, 2011

A Few More New Cards

Happy Monday - I know it's not everyone's favorite day of the week, but lately it's becoming mine for some strange reason.

One of the fun things I get to do is to make samples for the card kit add-on to the Green Tangerines Kit Club .  The card kit uses some of the same papers and cardstocks as the main layout kit, but added to that are some items unique to the card kit itself.  I try to make at least 10 cards with each card kit, but this month I got 11 made. I can't show you all the cards yet, but I can give you a "sneak peek" at some of them. Instead of asking you to scroll through individual sneak peeks, here's a composite of some of the cards that I'll be able to share fully next week!


This past weekend, I had a choice....clean, or craft...guess which one I chose? (OK, I did do some cleaning, and a LOT of laundy, but still...)  I was able to get a few more cards made. I had picked up some of the new Echo Park Victoria Gardens papers in the form of the 6x6 paper pack, and I couldn't wait to make up some cards using it...as you can see. LOL


Supplies:
Patterned Papers: Echo Park Victoria Gardens Collection    Green frame: Spellbinders Labels 20   
 Clear German Glass Glitter: Etsy    Printed Chipboard Chip: Studio G    Sentiment Stamps: Papertrey Ink   
Pearls and White Cotton Lace: craft store    Mini Roses: Prima    Paper Doily: Martha Stewart    Hug Snug Seam Binding 


Supplies:
Patterned Papers: Bo Bunny Gabrielle Collection (pink) & Echo Park Dots&Stripes (aqua)
Mini Roses: Prima    Lace: Prima    Pearls: Recollections    Image downloaded from the Internet
Hug Snug Seam Binding


Supplies:
Patterned Papers: Echo Park Victoria Gardens Collection    Mini Roses: Prima
Pearls: Recollections    Ribbon: craft store    Lace: Etsy    Hug Snug Seam Binding
Cancellation Stamp: BasicGrey    Sentiment Stamp: Hero Arts
Vintage Rose Image downloaded from the Internet

Have a great week!


Related Posts Plugin for WordPress, Blogger...