Showing posts with label birthday. Show all posts

Thursday, March 19, 2015

Wishing...

It's been a while since I've made a card heavy with die cuts, and I was ready to play with a few dies that I haven't used in a bit, along with a new one, and a couple often used favorites. And since my mother's birthday is coming up very soon, what better time to make one with lots of flowers and pearls and girly embellishments? :)

So here's Mom's card this year...layers of cream diecut cardstock with lots of pretty pink flowers and loopy satin ribbon bows...


There are several layers of cardstock stacked to make the diecut scalloped bottom border, but let's start with a closeup of that yummy Prima flower that's the centerpiece...I need to find another set of this one...it has all the fun layers and gems that I love so much...


I added some handcrafted cherry blossoms and some mulberry roses alongside it...


Here you can see the layers...three in all. The card base has a diecut scallop along the bottom edge, the second layer has a different scallop edge and an open scrollwork edging above it, and the top layer has a scalloped bottom edge and the distressed punchinella die cut along the top right...foam tape holds all the layers down and gives it a bit of dimension...


And I couldn't resist adding a lone cherry blossom to the top corner...


Supplies:
Dies:   Spellbinders "A2 Scalloped Borders 2";   Sizzix Tim Holtz "Mixed Media";   Sizzix "Flowers Branches & Leaves";   Simon Says Stamp "Wishing";   La-La Land Crafts "Cherry Blossom Flowers" and "Stitched Elements"
Stamp:   Simon Says Stamp "Sending & Wishing"
Flowers:   Prima (large pink);   Wild Orchid Crafts (small roses)             Stamens:   ChocolateLetters on Etsy
Pearls:   Recollections               Miscellaneous:   satin ribbon


Thanks for visiting today...have a wonderful weekend!

Monday, December 1, 2014

Mixed Media Birthday Canvas...

Good morning all...happy December!

You've seen me post in the past that masculine birthday cards are a little harder for me to create - I'm a shabby/flowery cardmaking crafter at heart. It's especially hard to be original for my husband's cards - he's seen everything I've ever made, and I always want his card to be something unlike anything I've made for someone else.

So this year, in lieu of a standard card, I made up an 8x10 mixed media canvas board as his "birthday card."  I always find a way to incorporate the number of his birthday on his cards, either on the front design, or within the inside verse, and he even okayed posting this without blurring out the numbers! LOL...


The first thing I did with the blank canvas was to add a coat of heavy gesso with a palette knife, and let it dry overnight.  I wanted a lot of background texture before I started with anything. Here's what the canvas looked like after I added the stenciling and modeling paste, color mediums, patterned papers, spray inks and paints, and stamps...


This metal bird started out gold...it's a large charm I found in the clearance section of a local big-box store. It's coated first with gesso, then an iridescent blue color spray, and a coppery-brown spray...


I added a small bunch of colorful fibers extending down from the bird's tail...they add more fun and colorful textures, and it's a great way to use up all those fibers I collected years ago when fibers were a hot, gotta-have-them item for papercrafting...


These washers, and the beautiful multi-colored mosaic tile that's a perfect match already, were in what I call my "doodads chest"...I knew there was a reason I kept all those hardware pieces around when I did all those supply-purge cleanups - and it's fun to be using them again! I coated the washers with gesso before I sprayed them to give them color...


I can't remember when I made this rose with Tim Holtz Grunge Paper...it's been so long I can't recall if I cut it on my Cricut, or handcut it.  The Prima metal clock, and the silver hinge you see peeking in at the bottom of the photo, were also gessoed and sprayed with various blue and brown sprays for aging color. More little gold seed beads are scattered around to brighten things up a bit...


Even the little diamond wire piece that was diecut from black cardstock was treated to a coating of copper brown spray so it blended with the aged metal of some of the other embellishments...


Supplies:
Canvas panel:   Windsor & Newton Artists Professional Canvas Board
Patterned papers:   Prima Vintage Vanity collection (A4 size)
Color Mediums:   Lindy's Stamp Gang - Hydrangea Blue,  Tweedle Dee Denim,  Bodacious Blush,  South Shore Sand,  Cattail Copper Brown,  Gag Me With A Spoon Gray
Stencil:   The Crafters Workshop Mini Bricks           
 Dies:   La-La Land Crafts Diamond Wire;   Impression Obsession Bare Branch
Metal clock:   Prima            Chipboard numbers:   Making Memories            Metal bird:   local craft store
Stamps:   Unity Stamp Co. "chickenwire:"; Tim Holtz Stampers Anonymous "Ultimate Grunge" (dots)
Memo pin:   Tim Holtz Idea-ology            Metal leaves:   TheFunkieJunkie.com
Art mediums:   Golden white gesso,  Liquitex heavy white gesso,   Golden matte gel medium,   Golden molding paste,   Stabilo All pencil - black
Miscellaneous supplies and hardware:   cheesecloth,   fibers,  burlap,   seed beads,   ribbon,   washers,   hinge,   mosaic tile,   chipboard bracket,   tickets,   black feather,   flower stamens


Thank you for visiting today...I hope your week is starting with a smile!


Monday, November 3, 2014

LOTV - Mixed Media Happy Birthday...

Happy Monday, everyone! Today's card is a mixed media card using Lili of the Valley patterned papers and stamps...a little twist to the usual style you see from me using the same supplies! :)

I'll start out by showing you the finished project, and then back up just a bit to give you an idea of how it all came together...


It's no secret I love the colors of the beautiful papers in LOTV's  Timeless Victorian paper pad - I've used them so often that I only have small bits of the papers left! But I wasn't about to let any bits of them go unused, so today, they became part of a mixed media card.  I started by gluing two pieces of a couple of the pastel, more solid-looking papers to a piece of 140-pound mixed media paper, and applying a coat of clear gesso over the top. The fun part is that the pieces I used had what appeared to be sprays of watercolor in the print already - perfect for what I had planned to come!...


Next, I used Archival Ink to stamp images from Set 21, Grunge Corners and Set 66, Grunge Elements around the edges of the piece, and used translucent molding (modeling) paste and a stencil to add a subtle textured design. If you look closely on the far right, and along the bottom, you can barely see the texture at this point...


Now it was time to start adding my watercolor sprays...I chose shades of aqua and orchid because those are the colors in the paper line that drew me to it in the first place (and so the bits of paper I was planning to add later would blend!). Now the stenciled texture is becoming more evident...


Next came more spraying, deepening the colors, and adding the sepia spray to accent some of the texture lines. If you look at the finished card, you can see that I later added some shading with a black Stabilo All pencil, highlighted the hearts and a couple of the vertical lines with white Gelato, and deepened some of the lilac-sprayed areas with another coat of color. I got so antsy to start adding embellishments and coloring flowers that I forgot to take a final pic of just the canvas itself. :)


The large rose in the center of the flower cluster was first made in white cardstock using Spellbinders' Rose Creations dies.  I colored it with Lindy's Stamp Gang Tilt-a-Wheel Teal and Sweet Violet Purple Teal sprays...


This time, instead of accenting the floral cluster with pearls as I usually do, I pulled out a baggie of multicolored beads, and glued them in clusters around the edges of the flowers...


I used a few more bits and pieces of the Timeless Victorian papers for small blocks around the sentiment, which is stamped using LOTV's  Set 25, Handwritten Phrases. The sentiment blocks are accented with more of the multicolored mini beads...


The little butterflies are part of Set 66, Grunge Elements - I first stamped them lightly with the black ink, then stamped again with VersaMark ink, and embossed them with a transparent powder that has tiny flecks of colored glitter...just a bit of sparkle...


And finally, down in the lower corner, another cluster of tiny beads as accent...


Supplies:
LOTV Patterned Papers:   Timeless Victorian
LOTV Stamps:   Set 21, Grunge Corners;    Set 66, Grunge Elements;   Set 25, Handwritten Phrases
Stencil:  The Crafters Workshop "Mini Confetti"
Dies:    Spellbinders Rose Creations and Foliage Two;   La-La Land Crafts Cherry Blossom Flowers
Teal roses:   LayoutsFromTheHeart on Etsy            Sweetheart blossoms:   Wild Orchid Crafts
Berry stem:   Petaloo            Lace:   local craft store
Color sprays:   Lindy's Stamp Gang - Pop Rock Purple,  Tilt-a-Wheel Teal,   T-Bird Turquoise,
Sweet Violet Purple Teal,   Sandra Dee Sepia
Miscellaneous:   seed beads,  hemp cording


Thanks for visiting today...I hope your week is starting with a smile!


Friday, October 3, 2014

Happy Birthday - Masculine Mixed Media Card

TGIF...Hurray for Fridays!

Early last week, I shared a fun mixed media canvas with lots of deep colors and feminine accents and embellishments. As I was making that canvas a few weeks ago, I was thinking how the colors might be the perfect combo for a masculine birthday card I needed at the end of September.

So once I finished the lacy, flowery canvas, my mind started turning in a less "frilly" direction, and for the first time in a long time, a masculine card came together quickly!


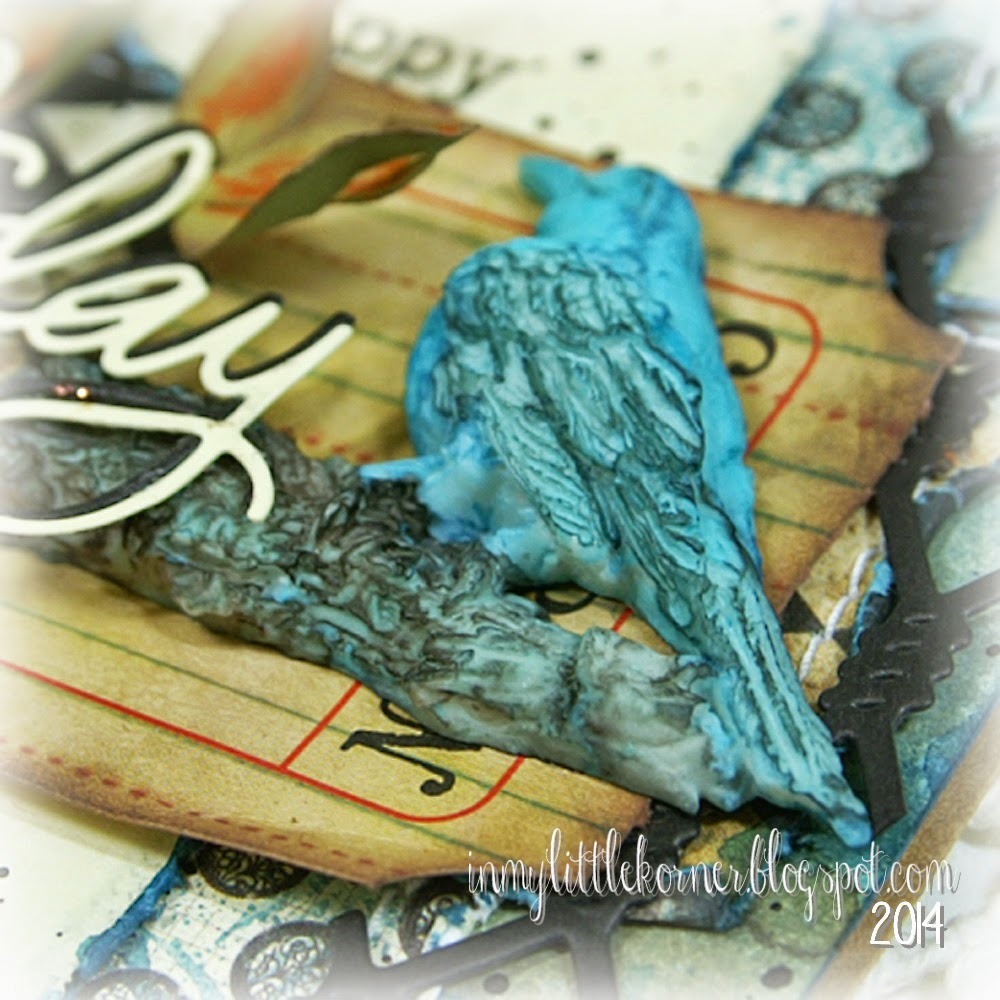
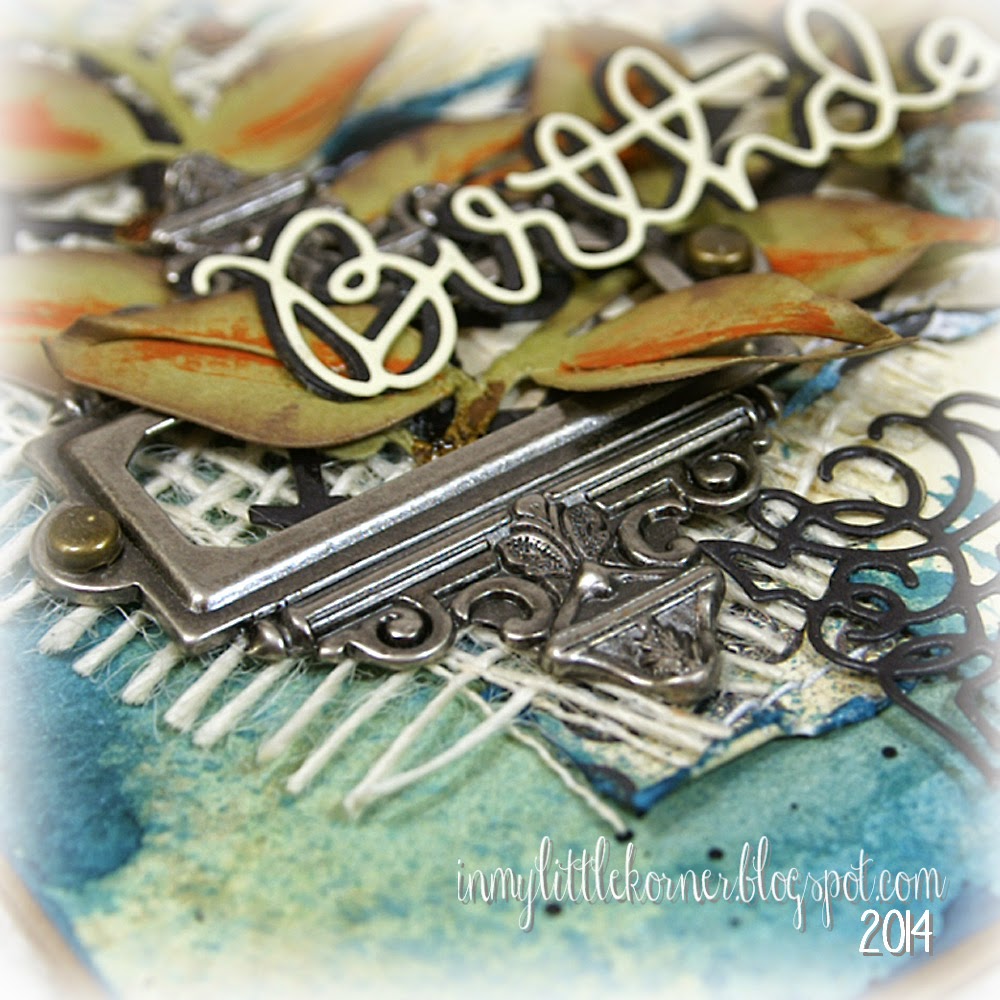
This time, I used some patterned papers over the painted background, accenting them with a piece of white burlap, one of my favorite wire dies, a torn piece of ticket, a metal bookplate, and some die cut leafy accents. There's another resin bird-on-a-branch, again colored with medium and dark blue, but this time accented with a dark sepia spray...


I used a combination of stamped words and a large die cut word for the sentiment...


Here's how the base piece looked before adding the papers and embellishments. This time, I used a light tan spray, added the medium green, then medium and deep blues...no orange in the background this time...


Supplies:
Patterned papers:   Authentique Enchanted collection
Sentiment stamp:  Winnie & Walter "The Big, The Bold, and The Happy"
Color mediums:   Lindy's Stamp Gang Flat Fabios (Danny Zuko's Denim,  Ocean Breeze Blue,  Merry Go Round Green,  South Shore Sand,  Sandra Dee Sepia)
Dies:   Simon Says Stamp "Happy Birthday";   La-LaLand Crafts "Diamond Wire" and "Berry Flourish" ;  
My Favorite Things "Four Corners Dienamics"
Resin Bird/Branch:   Prima            White burlap:   TheFunkieJunkie.com
Miscellaneous:   Tim Holtz Ticket and Ornate Bookplate;  Liquitex Ink!-Carbon Black;  Cinnamon stickles


Thanks for visiting today...have a wonderful weekend!


Monday, August 18, 2014

Happy...Take Two...

It's the start of a new week...happy Monday, all! Today's shabby chic card is just for fun, so that's why the sentiment just says, "happy." :)

I started with a background of neutral medium gray woodgrain paper, added a couple pieces of turquoise patterned papers, shabbied all the edges, then played with a white ink pen, a stencil, and a bit of splattering.   It started out as just a background to make and put aside for later when I needed to make up a card quickly, but ended up getting made up now because I had an idea, and went with it...


I decided to die cut a golden yellow doily, and accent the card with yellow, green, and white to add some more brightness to the dark background colors. The bit of pink on the edges of the yellow gardenia adds a nice touch of fun...


Instead of stamping a sentiment in the lower corner, I die cut the word "happy" - I couldn't choose between the black word or the white, so I chose both! I backed the white with the black to add dimension, and nestled it into the flowers...


Supplies:
Patterned papers:   My Minds Eye Bramble Rose (doily);   My Minds Eye Miss Caroline/On the Bright Side Two (aqua dot);   My Minds Eye Miss Caroline/Dilly Dally (teal and woodgrain)
Dies:   Prima Eyelet Doily #1;   My Favorite Things Leaf-filled Flourish;   Poppy Stamps Massa Leaf Background;   
Simon Says Stamp "happy"
Stencil:   Memory Box Rings & Puddles            Flowers:   Wild Orchid Crafts           
Yellow stamens:   ChocolateLetters on Etsy            Pearls:   Recollections
Miscellaneous:   white hemp cording, Uni Posca white paint pen


Thank you for stopping by for a visit today...I hope your week is starting with a smile!


Wednesday, August 13, 2014

LOTV-Happy Birthday...

Happy Wednesday, everyone...I hope your week is going well.

When I received some of the new papers from the latest Lili of the Valley release, I knew that Snow Princess and the coordinating Snow Princess Solids would be among the first new papers I'd play with-I can't resist those aquas and purples!

(I seem to be on a bit of a "purple binge" lately...but it's almost over. LOL) Today I'm sharing a wintery birthday card made with a few of the purple papers in the two Snow Princess pads - accented only with white, and including a sprinkling of Glistening Snow-Tex to add to the wintery feel...


The sentiment is short and sweet, from Set 25, Handwritten Phrases, stamped onto a banner die cut, and  edged with a bit of the Snow-Tex...


Normally, when I used a pearl spray, it ends up at the top or the side of the floral cluster, so I went the opposite direction this time, and used the spray at the bottom, to accentuate the sentiment banner...


The largest flower is made up of several smaller Prima flowers, with texture paste and Snow-Tex adding some dimension. It's surrounded with smaller roses and a single large white leaf, with tiny branch accents as "fillers"...

Supplies:
Patterned papers:   LOTV Snow Princess and Snow Princess Solids
Stamps:   LOTV Handwritten Phrases
Dies:   Prima Eyelet #1 doily;   Tim Holtz Tattered Banners
Punch:   Martha Stewart Medium Branch           Large flower & leaf:   Prima
Mini roses:   Wild Orchid Crafts          Pearls:   Recollections
Braided trim, pearl spray, stamens:   local craft store
Miscellaneous:   white twine, white thread


Thanks so much for visiting today!


Monday, July 7, 2014

Happy...Shabby Chic Mixed Media Collage Card...

Happy Monday, everyone! I'm starting off the week with a mixed media collage card. I experimented with a new medium (new to me, that it), Spectra Bleeding Art Tissue papers. I can see a lot more fun about to happen with these!

I'll post some stepouts at the end of the finished pictures, but in the meantime, here it is:


The only sentiment on it is the word "happy"...I have a special use in mind for this card, but if I change my mind, I have options for later use with that simple one-word sentiment front and center...


I die-cut the heart from kraft cardstock, then dry brushed it with white craft paint, and finished off by swiping a deep purple ink pad over the edges...


It's been too long since I used one of my favorite shabby fabric roses on a card. I still have several of these left in my stash, in a variety of colors...


I love the way texture pastes pick up the colors of the (water soluble) medium just beneath them. This is a good example of how it worked in my favor on this card - you can see more of the details in the stepouts below...


Supplies:
Dies:   Spellbinders Lace Hearts;   Sizzix Flowers Branches & Leaves
Stencil:   Memory Box Honey Comb
Stamps:   Tim Holtz/Stampendous "Ultimate Grunge"
Fabric rose:   Frogfeathers on Etsy          Small flowers:   Wild Orchid Crafts
Pearls:   Recollections          Ornate label plate:   Tim Holtz          Butterfly punch:   Martha Stewart
Mixed media supplies:   Spectra Bleeding Art tissue, watercolor paper, gesso, Studio 490 Crackle Paste,
washi tapes, Tim Holtz tissue tapes, matte medium, cheesecloth, twines, white craft paint, Dymo labeler


I must apologize for the quality  in the stepout photos below. I was working late at night, so there were only my Ott Lights available for photographing, and to get enough light on the pieces, there was a bit of glare. I tried to edit out as much of it as possible for the sake of your eyes...LOL

The first step was to adhere a piece of patterned paper to a piece of 140 lb cold press watercolor paper using matte medium (I used watercolor paper because it was sturdy enough to hold all the moisture from what I was about to do to it). I chose a patterned paper that literally is a "pattern" paper...it looks like a piece from a sewing pattern.

When that dried, I applied a thin coat of gesso, leaving the very edges of the piece "clean."  That's when I applied the bleeding tissue pieces and spritzed them with water and let them sit for a minute or so before removing the tissue pieces.  I let the paper dry completely (took about 1/2 hour), distressed the edges with a Tonic edge distresser, and this is what it looked like so far...


You can see that the colors of the tissue over the gesso are a bit muted, but are much more concentrated around the edges of the paper, where I didn't apply the gesso. That's the effect I wanted.

By the way, Spectra makes non-bleeding tissue, also, so if you want to purchase some of this to play with, make sure it's the "bleeding art tissue" you're purchasing.  Here are a few online links to get you started - here   here  and here.

The next step was to apply a few strips of washi tape and tissue tape to the page...


Next was stamping (using Archival Ink or another type of water resistant/waterproof ink) a couple grunge stamps, and applying texture to a couple corners using a stencil and crackle modeling paste. See how the colors left by the tissues seep through the modeling paste on the lower left and upper right corners of the paper? Aside from the muted center/deep colored edges effect, that was another reason I applied the gesso first, then the tissue colors. Modeling paste picks up the colors of any acrylic paint/watercolor/other water soluble medium beneath it as it dries. The sharp line between aqua and white in the lower left is caused by the tissue tape beneath the paste. ...


And now the piece was ready to embellish. :)  These pieces can become pretty heavy when using watercolor paper and all the mediums and embellishments on top, so I attach them to the front of my cards using Scotch foam tape around the four sides and in the center before I start applying embellishments.

Thanks for visiting today! I'll be back in a couple days with a CAS watercolor card...a real change of pace. :)  I hope your week is starting with a smile!


Related Posts Plugin for WordPress, Blogger...