Showing posts with label thinking of you. Show all posts

Friday, March 13, 2015

Three of a Kind...

Happy Friday the 13th, everyone...I prefer to turn the tables on folklore and hope it's a lucky day for you all!

I pulled out a Penny Black floral stamp I've had for a while but haven't used on a card yet, and decided to mix up my traditional watercolors with watercolor pencils and play around. After stamping the image three times with various shades of black and grey ink, and watercoloring all three a bit differently, I couldn't decide which piece to make into a card, so I made up all three. :)

Once I had them colored in, I couldn't resist the urge to accent with a fun new set of circle stamps, a bit of ink splatter using both a brush and a splatter stamp, bows and lace, and some glittery accents to the butterfly on the stamp.

First, I colored the image in pink and green...I was in the mood for spring colors...


On all three cards, I colored the butterfly twice (using the same colors), then cut out the second butterfly and adhered over the first, accenting the top butterfly with Stickles and a white pearl pen, and bending the wings up for a little dimension...


Then I played with orange and yellow, and ended up with what I now call my "candy corn flowers." I had stamped this one using black ink, so the contrast with the bright colors really makes the details stand out. This card is on its way to a cousin across the country...


Forgot to mention that I added some gold microbeads to the centers of all the large flowers...the pic of the candy corn flowers shows them the best...


And after all the bright colors, I wanted to try something a little more subdued, and maybe a bit darker, so I turned to a fuchsia color flower and a darker background...and I liked that, too...


Supplies:
Stamps:   Penny Black "Botanical Notes";   Simon Says Stamp "Friendship Messages" (sentiments);   Indigo Blu "Limor Circles";   Winnie & Walter "Big Bang Confetti"
Color Mediums:   Windsor & Newton Cotman watercolors;   Caran d'Ache Supracolor watercolor pencils;   "Ice White" Viva Pearl Pen;   "Diamond" Stickles
Miscellaneous:   gold micro beads,  Uni Ball Signo white pen,   twine,  pearls,  lace strip, Archival Inks


Thanks for visiting today...have a wonderful weekend!


Friday, September 12, 2014

LOTV - Sending You Love...

TGIF...happy Friday, everyone! Today I have another card for this month's Lili of the Valley Pretty Papers challenge. There's still plenty of time for you to enter, and there are prizes involved...I hope you'll check it out and join in the fun! :)

There are two adorable new image stamps that were added to the shop this week - Bonfire and Halloween. And if you're short on time, or prefer to use images already colored, and haven't already checked out the eight new Art Pads for holiday cards and projects, you really should!

But today, I'm straying from the holiday theme, and showing off a "fully loaded shabby chic" card using beautiful papers from Snow PrincessSnow Princess Solids, and a coordinating striped paper from Pastel Dreams ...


The little tied bundle of post cards is made using a stamp from Set 46, Background Bits-Notes, and the sentiment from Set 29, Vintage Sentiments-Just to Say is stamped onto a little die cut heart and tied below a small trio of roses...


Up in the corner is a larger cluster of roses...there's even a light and airy die cut peeking out from under the postcards...


And down in the lower corner, another small cluster of roses...


Supplies:
Patterned papers:   LOTV Snow Princess,  Snow Princess Solids,  Pastel Dreams
Stamps:   LOTV Set 46/Background Bits-Notes, and Set 29/Vintage Sentiments-Just to Say
Dies:   My Favorite Things Royal Leaves;   Memory Box Queen of Hearts
Flowers:   The Paper Studio,  Wild Orchid Crafts            Striped twine:  The Twinery (lilac stripe)
Miscellaneous:   white hemp twine, cheesecloth


Thanks for stopping in for a visit today...have a wonderful weekend!


Monday, June 16, 2014

LOTV - Just For You...

Happy Monday, all! Today's card started out to be a masculine card, with the papers in tones of dusty aqua, dark tan, and black. But once I laid out the pieces and took a step back to see where I wanted the design to go, it didn't just look masculine, it looked too dark.  So I tried playing with a piece of red washi tape and that's when the card took a turn. Bright red and gold flowers and red gems were added, and now the card was bright and cheerful, but no longer a masculine one!

With the sentiments from LOTV's Set 10, A5 Verses and Set 25, Handwritten Phrases, this card could be used for so many different occasions, or for no special reason at all. :) The muted shades of papers come from three different LOTV paper pads - Baskets and Bunnies, with snippets of pieces from  Pressed in Time, and Father Knows Best - and blend together perfectly for a soft and muted background to the bright floral accents...


I used a bit of foam tape on the vertical paper pieces to add a bit of dimension. The wooden clock face on top of bright white cheesecloth centers the floral clusters, and a few drops of Glossy Accents in strategic places keeps the silver chain wrapped around the clock face and draped at the bottom of the card...


I found the small silver bar in my stash, so I used it as a rod to drape the top edge of the sentiment piece over. Once again, Glossy Accents beneath the square cubes at either end keep the rod in place, and foam tape beneath the sentiment piece keeps it level...


Supplies:
Patterned papers:   LOTV Baskets and Bunnies (stripe), Pressed in Time (green & tan), 
and Father Knows Best (black stripe)
Stamps:   LOTV Set 10 / A5 Verses and Set 25 / Handwritten Phrases
Punch:   Martha Stewart Cornice Edge          Dies:   Sizzix Flowers Branches & Leaves
Clock face & red gems:   Recollections          Silver bar:   7Gypsies
Flowers:   Wild Orchid Crafts 
Miscellaneous:   washi tape, silver chain, twine, pewter gem, cheesecloth


Thank you for visiting today...I hope your week starts with a smile!


Thursday, October 31, 2013

Believe in Your Dreams...

Happy Halloween!  We have a busy day today...but we'll all be back in time for our annual "block party" Halloween pot luck dinner out on the cul-de-sac where we eat, socialize, enjoy whatever game is on tv (oh yes...there is actually a tv that's wheeled out onto the street and hooked up with all kinds of high-tech gadgets - Thursday night football will be the featured showing tonight), and most importantly, pass out candy to all the trick-or-treaters who come by. It's a fun tradition!

If you have a bit of extra time, and you love Lili of the Valley blog hops (and who doesn't?), there's a fun one going on right now. This time, part of the team is showing how they've used the same new image stamp - a fun new twist for this release! As always, there are fun prizes to be awarded for hopping and leaving comments, so be sure to head on over to the Ideas to Inspire blog to start the Oh-So-Girlie hop using the new "Getting Ready" stamp!

But today's card that I'm sharing with you *is not* part of the blog hop, and has nothing to do with Halloween or the holidays. It's a shabby friendship card with a message of encouragement for someone who might need a little pick-me-up while striving to reach a goal. It features several Lili of the Valley stamps, and of course, papers by LOTV, too...


The larger main sentiment comes from LOTV's Set 61, Quotables/Celebrate set, while the supporting sentiment on the small tag inside the memo pin can be found in Set 29, Vintage Sentiments/Just to Say set. The blue and white dotted paper (and the solid blue you can see peeking out from behind it) can be found in the new Winter Wishes paper pad...


Of course, I had to surround it all with a shabby floral cluster, complete with cheesecloth pieces, flowers, pearls, hemp bow, and other little bits of fun...


Instead of just placing some flowers on the upper corner, I tucked a cluster of rosebuds and leaves behind the top corner of the sentiment block and the stamped postcard piece that's from LOTV's Set 46, Background Bits/Notes set , and added another hemp bow behind one of the rosebuds...


Supplies:
Patterned papers:  Winter Wishes collection, NitWit Collections for Lili of the Valley (blue papers);   
Country Lady collection, NitWit Collections for Lili of the Valley (tan background paper)
Stamps:   LOTV Set 61, Quotables/Celebrate;   LOTV Set 29, Vintage Sentiments/Just to Say;  
 LOTV Set 46, Background Bits/Notes (postcard)
Flowers:   Wild Orchid Crafts;  Prima;   local craft store          Stamens:  ChocolateLetters on Etsy ;  Wild Orchid Crafts
Pearls:   Recollections          Tim Holtz Memo pin (embellished)
Miscellaneous:   cheesecloth, hemp cording, Stampendous Frantage embossing powder


Thanks so much for popping in for a visit today!


Tuesday, September 3, 2013

The Best Thing...

What a fun "natural alarm clock" we woke up to yesterday, the last day of our holiday weekend - the first rain since the end of June (not unusual around here) peppered with loud, rolling thunder (a bit more unusual around here this time of year).  It was a most welcome break from the high heat of late, that is supposed to continue for another 3-4 weeks.  As much as I love this area where we now live, and the better quality of life we're able to have, the one thing I do miss about the Silicon Valley area where I grew up was the more moderate temperatures and shorter hot summers. :)

Today's card is one where the color scheme pretty much happened after I prepared the sentiment block using one of Lili of the Valley's Quotables/Friendship stamps.  After I stamped the sentiment in black onto one of the papers in LOTV's new Beach Bliss paper collection , and distressed the edges exposing the white paper core, I knew the color combo I wanted to use...aqua, contrasted with black, and brightened and accented with pure white...


One of the most fun things about my rose die set is that I can custom create roses to match just about any color, especially handy when I want to use a monochromatic, or mostly so, color scheme.  This time I was lucky that I had one sheet left of a pale aqua that was a perfect shade to match the aquas in the patterned papers. I used some ready-made mini roses in slightly different hues to complement the large rose...


I used a couple different mini heart dies to create a chipboard open heart lightly sprinkled with German glass glitter, to sit behind the roses inside the cluster...


Supplies:
Patterned papers:  "Beach Bliss" collection, Susan Darter/Raspberry Road Designs for Lili of the Valley
Sentiment stamp:   Lili of the Valley, Set 62, Quotables/Friendship
Dies:   Spellbinders Rose Creations;   Memory Box Elegant Scrollwork;   Papertrey Ink Heart Prints;
Sizzix Flowers, Branches, & Leaves
Small roses & flower stamens:   Wild Orchid Crafts          Doily:  Wilton          Pearls:   Recollections


Thank you for visiting today...I hope your week started with a smile!


Friday, August 16, 2013

Happiness...

Friday already! For many in our area, this has been the last week before school starts again, although some schools in a neighboring district started back this week. Why do summers seem to fly by so fast compared to the other seasons? :)

Today's shabby card is one with sentiments that could be appropriate for cheering up a dear friend or relative, or simply as an all-occasion card.  It features some of Lili of the Valley's *new* Antebellum collection papers, as well as a few different stamps...


The piece of music paper with the rose was perfect for the front of this card. There's a space to the right of the rose that's just the right size to stamp a large sentiment...this one is from Set 61, Quotables/Celebrate.  I applied some Diamond Stickles around the edges of the petals of the rose just to accentuate them a little...


The small piece of music paper behind the rose piece is stamped using Set 46, Background Bits/Notes, and the words on the small tag attached to the stick pin are from Set 35, Christmas Handwritten Phrases...


A small cluster of roses sits on top of a couple Hug Snug bows and pieces of die cut leafy branches...


Supplies:
Patterned papers:  Lili of the Valley/Raspberry Road Designs Antebellum collection
Stamps:   Lili of the Valley Set 46, Background Bits/Notes;  Set 61, Quotables/Celebrate;   
Set 35, Christmas Handwritten Phrases
Flowers:   Wild Orchid Crafts          Dies:   Sizzix Flowers Branches & Leaves          Pearls:   Recollections         
Hug Snug seam binding          Maya Road stick pin (embellished)          Stickles/"Diamond"


Thanks so much for visiting today...have a wonderful weekend!


Sunday, March 24, 2013

TSTR-Lovely Layers

Happy start-of-a-new-week, all!  I hope you had a great weekend.

It's the final week of my Guest Designer feature at The Shabby Tea Room, and it's been an especially fun month of challenges, including this week. Rebekah is our host, and our challenge was to use the colors in the photo and the sketch as a guide for our layout design.

So, here's my card for this week...


based on this inspiration photo and sketch...


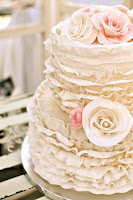
You can see right away I picked up on the pink roses in the inspiration photo. :)  I added more pink highlights by lightly inking all the edges of the patterned paper layers, and distressing them slightly with an edge distresser to mimic the ruffled effect in the photo...


Lots of pearls were added, with the strung strips of pearls atop the wide crocheted lace, and loose pearls scattered through the cardstock flourishes and in the upper corner...


And last but not least, a peek at the inside...


Supplies:
Patterned papers:  Bo Bunny Chiffon Dot (cream dot);  Authentique Gathering collection (cream floral);  Pink Paislee Butterfly Garden collection (text);  Cosmo Cricket Circa 1934 collection (black numbers)
Edge Punch:  Martha Stewart Daisy Edge     
Dies:  My Favorite Things Decorative Doily Duo and Mini Rolled Rose;   Memory Box Elegant Scrollwork
Shabby fabric rose:  Frogfeathers on Etsy          Pearl strips:  Suhafuha on Etsy      
Mini flower applique:  TheFunkieJunkie.com         Loose pearls:  Recollections     
Sentiment stamp:  Technique Tuesday/Ali Edwards
Miscellaneous craft store supplies:  cheesecloth, cotton laces


Thanks for visiting today...I hope your week is starting with a smile!


Thursday, January 31, 2013

Hybrid Happy...

I've gotten my new printer, and it's so much fun to be able to print digi elements again!  (I ended up not getting another big photo printer after all, but found a great deal on a Canon Pixma MG6220, and so far, I'm loving the photo quality and versatility of this all-in-one printer.) Luckily I had some elements printed up before my older printer died completely, but I really wanted to print out some of my newer papers and collages, and didn't realize how much I depended on that printer until it wasn't working up to par anymore.

Now we're in the process here of getting all my programs and files moved over to a newer and faster computer.  So there's less time for crafting while I verify that all my files are backed up, and all the softwares work after installation.  It's a time consuming process, and I'm so glad my better half is a computer geek and loves doing this kind of thing, because it's not my favorite activity by a long shot.  I'm one of those people who enjoys using and learning software tasks on the computer, but is hopelessly lost when trying to figure out how it all works on the hardware side.

In the meantime, here's a little "Thinking of You" card that uses a beautiful background paper from ByDigitalPaper on Etsy...this one is in Janet's Shabby Chic Paper set...


I inked up the chipboard frame with Spun Sugar and Brushed Corduroy Distress Inks, coated it with clear coarse glitter, and attached it directly to the center area of the paper that had no printed flowers.  The sentiment is stamped on the inked diecut and adhered with foam tape to the center of the larger frame. (It's been a long time since I attempted to do shadow stamping. I literally held my breath as I stamped that sentiment a second time, hoping I had placed it offset as I thought I had....LOL)  I cut the leafy branch piece in half, and put part of it off the left side...


A couple Hug Snug bows with a spray of pearls in the center, a small pearl flourish, and the other half of the leafy branch beneath the pearl flourish...and that's all this card needed to be finished...


Supplies:
Patterned paper: ByDigitalPaper on Etsy/Shabby Chic Paper      Chipboard frame:  Tattered Angels
Dies:  Sizzix Flowers Branches & Leaves;  Spellbinders Labels 20
Pearls:  Recollections      Sentiment stamp:  Inkadinkado      Hug Snug seam binding


Thanks so much for stopping by for a visit...I hope your week is going well!


Wednesday, January 23, 2013

The Same...but Different...

Generally, I like to make each card a one-of-a-kind design...even on the "twin sets" I make, I try to change up something in the design so they're not completely identical. And now and then I like to take some elements of a previous project and use them in a different way to see if I can get a different look.  I did that with the digital collage used on the front of today's card.  I posted a card here last July, and the collage was the center of a brighter and more "formal" card.  Today it's definitely "shabbied" up with distressed and painted edges and surrounded with deeper tones...


It's a smaller floral cluster than my usual, sitting atop a cardstock flourish and accented with a seam binding bow and handcrafted stick pin of silver with white pearls and one simulated black pearl...


Supplies:
Digital collage elements:  Paris label, vintage frame, pink rose, Eiffel Tower, teacup: The Graphics Fairy;  
floral clusters:  vintageimages.org (flowers45 and flowers334)
Patterned papers:  Crate Paper Random collection;  Prima Tea Thyme collection
Sentiment stamp:  Papertrey Ink      Lace:  TheFunkieJunkie.com      Die:  Memory Box Elegant Scrollwork
Mini roses:  Wild Orchid Crafts      Mini pearls:  Recollections      Hug Snug Seam Binding 
Miscellaneous:  handcrafted stick pin, clear coarse glitter, white craft paint


Thanks so much for stopping by today...I hope your week is going well!     


Wednesday, January 2, 2013

Warm Winter Wishes...

Happy New Year, everyone! The weather here lately is bright and sunny...but brrrrrr...cold. (I realize for those of you who live in snowy climates that my definition of cold is probably different than yours...LOL. For us, freezing/32 degress F means "brrrrr....COLD!" )  But to be truthful, I like the cold weather, because it's a reminder that we actually have something called winter here....and because summer seems to go on forever.

So today I have just one new card to show...and it's a result of our "brrrrr....cold" weather lately that I was inspired to make this up in grey, tan, and white with some sparkly thrown into the mix...the colors of "cold."


I gathered up some burlap ribbon to form the base of the flower, then topped it with paper leaves, mini white craft store fabric flowers, some floral wires dipped in white Flower Soft, a Hug Snug bow, and a pretty white organza flower with a pearl cluster center...


A couple punched snowflakes were covered with clear coarse glitter, a cluster of pearls was added to the center of each one, and they were popped off the page with foam tape...


Supplies:
Patterned papers:  Basic Grey Capella collection; Carta Bella Winter Fun collection
Punches:  Martha Stewart Arctic Snowflake and Eyelet Lace edge
Die:  Papertrey Ink Victorian Lace Border      Mulberry paper leaves and flower:  Prima
Pearls:  Recollections      Memo pin:  Tim Holtz      Hug Snug seam binding
Miscellaneous:  cheesecloth, burlap ribbon, fabric flowers, coarse clear glitter

Thanks for visiting today...I hope your week started with a smile!


Related Posts Plugin for WordPress, Blogger...