Monday, September 8, 2014

Just for Fun...

Hi-ho, happy Monday! Today's card was made just for fun...a mix of some newly-found older supplies, with a new doily die, some chipboard and flowers...and a take-it-as-it-comes attitude while it all came together. :)

A while back, I found a baggie with some faux "wood planks" that I made up last year...pieces of chipboard cut and coated with paint, crackle medium, ink, and treated to lots of distressing. I used one small piece of it on a watercolor card a few weeks ago, stamping the sentiment onto it. Today, I pulled more of those planks from the baggie to form a background for the card...only this time, I added some splatters from a couple different colored paint pens to further distress the pieces...


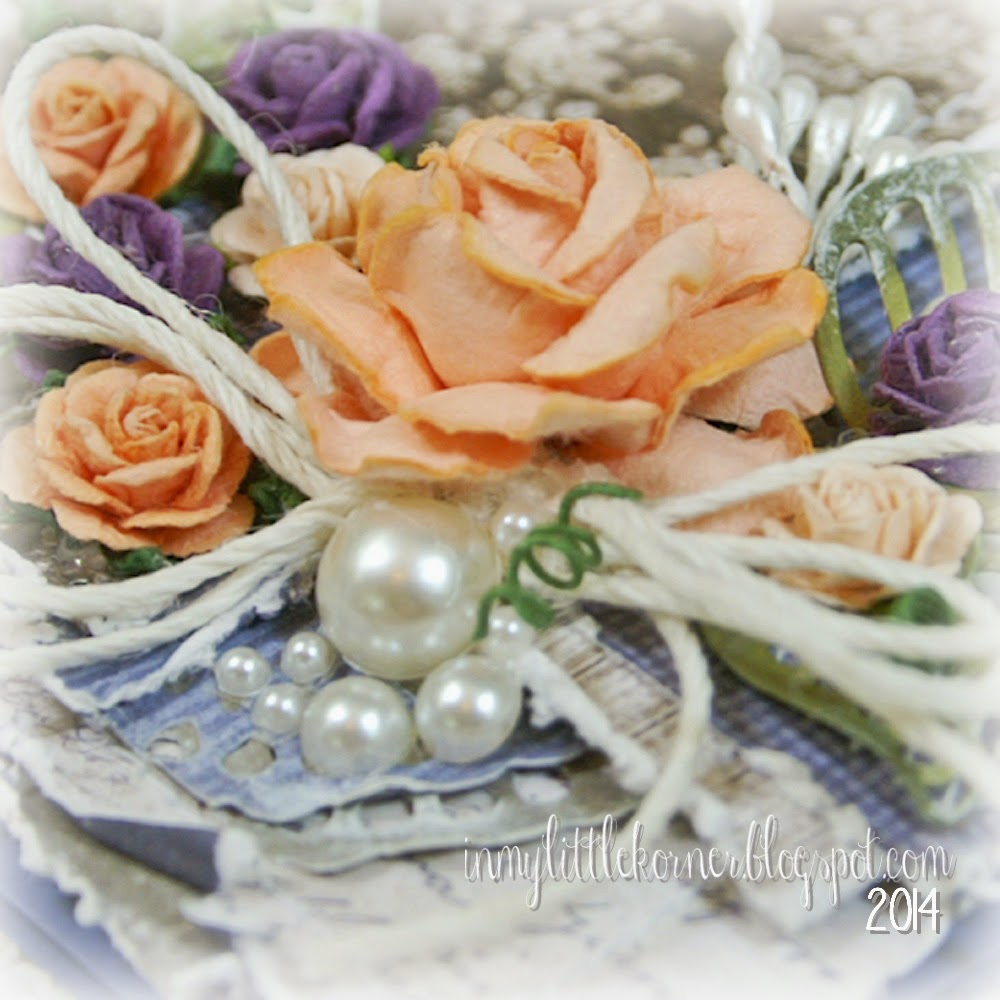
The largest flower in the cluster is the rose made using the Spellbinders Rose Creation dies...


and up the side, a flower stem filled with mulit-colored flowers and yellow leaves...the aqua leaves were die-cut and threaded into the stem to add more of the blue accents...


The chipboard window was coated with white paint, then some crackle medium, and finally a couple different colored inks to accentuate the crackles...


Here's a closeup of the faux wood strips...


Supplies:
Patterned papers:   My Minds Eye "Sky's the Limit"
Chipboard window:   Maya Road
Dies:   Prima Doily #2 Pineapple;   Spellbinders Rose Creations;   Poppy Stamps Massa Leaf Background
Floral stem, small flowers:   Prima            Pearls:   Recollections
Miscellaneous:  white hemp twine


Thanks for visiting today...I hope your week is starting with a smile!


Friday, September 5, 2014

LOTV - Just Because...

Happy Friday, everyone! I'm ending this week with a shabby chic all-occasion card showcasing some of Lili of the Valley's beautiful new paper lines...and it just so happens that this month's challenge on the LOTV Ideas to Inspire blog is "Pretty Papers."  Right up my alley! :)

It's a "simply shabby chic" style card, using papers from several of the new lines. All the LOTV paper pads have several colorways of beautifully coordinated papers, but every now and then I like to challenge myself to see if I can blend several different lines of papers, and end up with a project that looks like it was made to go together. One of the things I like most about LOTV's papers is that I end up with a successful challenge every time I try it!

Today's card blends a pink striped pattern and a small pink-on-pink patterned paper from the new On a High Note pad, with a brown dotted pattern from the Enchantment pad, and finally, a tan and pink floral from the Country Meadow line...


Here are a few closeups of the floral cluster, starting with a top-down view of the closed rosebud stem...


I love these pretty painted buttons...perfect for a colorful touch atop a couple loopy twine bows...


And finally, a closeup of the sentiment from Set 29, Vintage Sentiments/Just to Say stamped onto a small tag that's been shabbied around the edges and topped with another loopy twine bow...


Supplies:
Patterned papers:   LOTV On a High Note,  Enchantment, and Country Meadow
Stamp:   LOTV Set 29, Vintage Sentiments/Just to Say
Dies:   My Favorite Things Royal Leaves;   La-La Land Crafts Honeycomb
Flowers:   Wild Orchid Crafts
Painted button:   TheFunkieJunkie.com            Pearls:   Recollections
Miscellaneous:   white hemp twine, cheesecloth


As a reminder...there's blog candy given away **daily** over on the LOTV Ideas To Inspire blog...there's a link button to it over there on the right sidebar -->  -->  -->  -->  --> . 

All you need to do to get your name in the draw for the daily blog candy is leave a comment on the I2I blog post...how easy is that!

And for some more fun news, LOTV is now a Platinum Partner at Splitcoast Stampers. If you're not already a member of this forum, check it out...it's free to join, and it's a wealth of information and inspiration.

Thanks so much for stopping by today...have a wonderful weekend!


Wednesday, September 3, 2014

Hugs...and Some Happy News...

Happy "hump day" everyone! I have some fun news to share today...I've joined the Wednesday Design Team for La-La Land Crafts! Each week I'll be joining the rest of the Wednesday team to showcase the creative ways we use the wonderful LLLC dies (and a few of their other fun products here and there)...it's only been a very short time since I joined the group, and I'm having a ton of fun already!

Today's card is my first for LLLC, and one of my "fully loaded shabby chic" projects...


and it's based on the following sketch inspiration...


Here are a few close-up shots...starting with a couple pics of the florals surrounded by "shabbified" leaves cut with the Open Leaf Flourish die...


and a closeup of the Scallop Border Die, cut from both the blue and taupe papers, layered atop the Lattice Doily Border Die...


Supplies:
Dies:   La-La Land Crafts Open Leaf Flourish,  Scallop Border,  Lattice Doily Border
Patterned papers:   Maja Design Vintage Autumn Basics
Sentiment die:   Technique Tuesday "hugs"
Silver metal corner:   TheFunkieJunkie.com          Pearls:   Recollections
Miscellaneous:   white stamens,  white hemp cording


Thanks so much for stopping by today...I hope you're having a wonderful week so far!


Friday, August 29, 2014

The Twinery - You Hold the Keys...

Happy Friday, everyone! Today's my last Friday as Guest Designer on The Twinery blog - I've had so much fun this month working with these beautiful twines.

I know what you're probably thinking as you look at today's project...there she goes with those same colors again! I've reached for this color combo a LOT this summer...don't know why...it just happened. But in my defense, all the projects I've shared lately in this combo have been meant to send to other people...this project is for me to keep and display in my craft room. So what better place to display something in colors that seem to come natural to me? :)


I started out with the desire to make an 8" x 8" canvas...until I discovered that I didn't have a blank canvas in that size sitting in my stash. And as I've admitted before, patience is not one of my strong points, especially when the creative muse decides to show her face! So, I took matters into my own hands, and made myself a sort of "watercolor panel" (that's not the right term, but I don't know what else to call it - it's like a canvas panel, only made with watercolor paper) by using wet adhesive and a brayer to glue together three layers of 140 lb. cold press watercolor paper. (I can hear the watercolor purists out there gasping...but it wasn't the most expensive watercolor paper brand, so if you break it down, it cost me less than the purchase of a canvas panel - even more of a savings if you factor in that I purchased a large pad of this paper with a 50% off coupon.)

This is when I thought this would be an experimental piece...I had no idea if this would work the way I envisioned. That's why I don't have any stepout photos - and I should have made some anyway - because it would have shortened the explanation a lot. So in lieu of photos, here's a written explanation of how I made this piece. Feel free to skip over the next few paragraphs if that's not of interest to you...I won't be offended, I promise. :)

The first step to the background was to stick a few random pieces of dry wall tape to the watercolor paper, then gesso over the tape to make sure it was secure, as well as to make sure it would accept water-based color mediums. I randomly gessoed the rest of the surface, leaving some areas clean, so they'd accept the color mediums in a different way.

Next I sprayed on a few different Flat Fabio sprays, and then mixed Merci Beaucoup Mint Flat Magical powder with gel medium, and applied it randomly with a palette knife. The tan areas are colored using Cafe au Lait Flat Magical powder, only this time mixed with water and applied with a watercolor brush. When this all dried, I distressed the edges of the panel, and went over them with Black Soot Distress Ink and an ink applicator tool.

Next it was stencil time. I used a circle stencil with modeling paste in two corners, and let it dry (love that when dry, it picks up the color of the water based medium beneath it - in this case, the sprays and the colored gel medium). Once the modeling paste dried, I accented the edges of the circles with a black Stabilo All pencil to add depth.

I sprinkled on some of the same sprays to form random spots/splotches - and did the same with a white ink paint pen. The white streaks are from running the edge of a palette knife through a pool of white ink on my craft sheet (made when I got the pen primed for dropping splotches - can't let it go to waste!) then running the inked knife edge onto the canvas.

As a final step before embellishing, I wrapped a few pieces of Cappuccino Solid twine around the piece, to break up the large square a bit and help center the eye on the embellishments I planned to add.

Now it's time for the embellishing fun. I wrapped two old clunky metal keys with The Twinery's Caribbean Solid and Caribbean Stripe twines, using craft paint on the portions I couldn't wrap. (Delta Ceramcoat Turquoise was the perfect match for the turquoise key) - then realized they didn't look finished until I added a little tassel to each one. I had die cut the word "you" but it looked a bit lightweight next to the heavy keys, so I pulled some Charcoal Solid twine, and glued it to the die cut word...now it looked more proportional...


Next step was to add a large floral cluster at a slight angle across the center - I had a digi collage I'd made up a couple years ago, and wanted to find a place for it among the flowers. I tucked a few loopy bows of The Twinery's Caribbean Solid and Lilac Stripe twines among the cluster...


Supplies:
Twines:   The Twinery - Caribbean Solid,  Caribbean Stripe, Cappuccino Solid,  Charcoal Solid,  Lilac Stripe
Stencil:   The Crafters Workshop Mini Circle Explosion
Dies:   Simon Says Stamp "you"';   Sizzix Flowers Branches & Leaves
Flowers and stamens:   Prima and Wild Orchid Crafts           Pearls:   Recollections
Vintage Image:   digi collage made with images from TheGraphicsFairy.com
Sprays:   Lindy's Stamp Gang Flat Fabios (T-bird Turquoise, Pink Ladies Pink, Raspberry Lemonade, 
Pop Rock Purple, Frenchy's Pink Pouf)
Paints:   Lindy's Stamp Gang Flat Magicals (Merci Beaucoup Mint, Cafe au Lait);  Delta Ceramcoat Turquoise;  white
Miscellaneous mixed media supplies:   Cold press watercolor paper,  drywall tape,  gesso,  modeling paste,  gel medium,  Dymo label,  Uni Posca white pen,  Black Soot Distress Ink,  cheesecloth,  Stabilo All pencil,  Prima edge distressing tool 


Thank you to Julie and The Twinery's Design Team for the fun month as Guest Designer, and thank you for stopping by for a visit today.  Have a wonderful weekend!


Wednesday, August 27, 2014

Always Believe...

Summer's almost over for most people, school's back in session for many around these parts, so I decided to make up one last "summer-y" watercolor card for fun!

I added a few more shabby details to this card, but it's still clean and simple compared to my usual style...


There's white cheesecloth between the background patterned paper and the card base, and both aqua and white cheesecloth between the watercolor layer and the background paper...fun texture, with pearls peeking out behind it all...


Here are a few detail shots around the front...


Supplies:
Image stamp:   Unity Stamp, "Andie Girl"
Sentiment stamp:   Unity Stamp, "Empowered Words"
Pearls:   Recollections
Miscellaneous:   Sakura Koi watercolors,  Uni Posca white paint pen,  cheesecloth


Thanks so much for stopping in for a visit today!


Monday, August 25, 2014

LOTV-Shabby Christmas Cheer...

Good Monday to you! I'm starting off this week with a very shabby Christmas card, using some of LOTV's beautiful new holiday papers, and a few little mini stamps in addition to the sentiment stamp.

I love the color combo of aqua and red for holiday cards...it's been my favorite for many years now. The new Festive Trimmings paper pad is filled with this combo, and I paired three of those papers with a monochromatic patterned paper from the Snow Princess Solids pad that was perfect for an accent background, and for stamping the sentiment onto...


I stamped a couple ornaments from the new Set 79, Christmas Mini Images - Icons, added a bit of watercolors, cut them into shabby tag shapes, and attached them over loopy seam binding bows...


The main sentiment, from the new Set 75, Christmas Wishes, is accented with small holly branches stamped with the new Set 78, Christmas Mini Images-Foliage ...


The die cut Christmas tree is coated with Vintage White Frantage embossing powder, and topped with a large pearl, which by total happenstance, is also the center of the large snowflake behind it...hurray for happy accidents!


The large bows are accented with die cut pine branches coated with Glistening Snow-Tex...


Supplies:
Stamps:   LOTV Set 75/Christmas Wishes,   Set 79/Christmas Mini Images-Icons,   Set 78/Christmas Mini Images-Foliage
Patterned papers:   LOTV Festive Trimmings (stripe, text, holly);  LOTV Snow Princess Solids (patterned turquoise)
Dies:   Spellbinders Labels 25;   Cottage Cutz Pine Tree Forest;   Impression Obsession Pine Branch
Pearls:   Recollections            Hug Snug seam binding
Miscellaneous:   Glistening Snow Tex,  Frantage embossing powder,  white hemp cording,  craft store snowflake


Thanks so much for visiting today...I hope your week is starting with a smile!

Related Posts Plugin for WordPress, Blogger...