Friday, October 3, 2014

Happy Birthday - Masculine Mixed Media Card

TGIF...Hurray for Fridays!

Early last week, I shared a fun mixed media canvas with lots of deep colors and feminine accents and embellishments. As I was making that canvas a few weeks ago, I was thinking how the colors might be the perfect combo for a masculine birthday card I needed at the end of September.

So once I finished the lacy, flowery canvas, my mind started turning in a less "frilly" direction, and for the first time in a long time, a masculine card came together quickly!


This time, I used some patterned papers over the painted background, accenting them with a piece of white burlap, one of my favorite wire dies, a torn piece of ticket, a metal bookplate, and some die cut leafy accents. There's another resin bird-on-a-branch, again colored with medium and dark blue, but this time accented with a dark sepia spray...
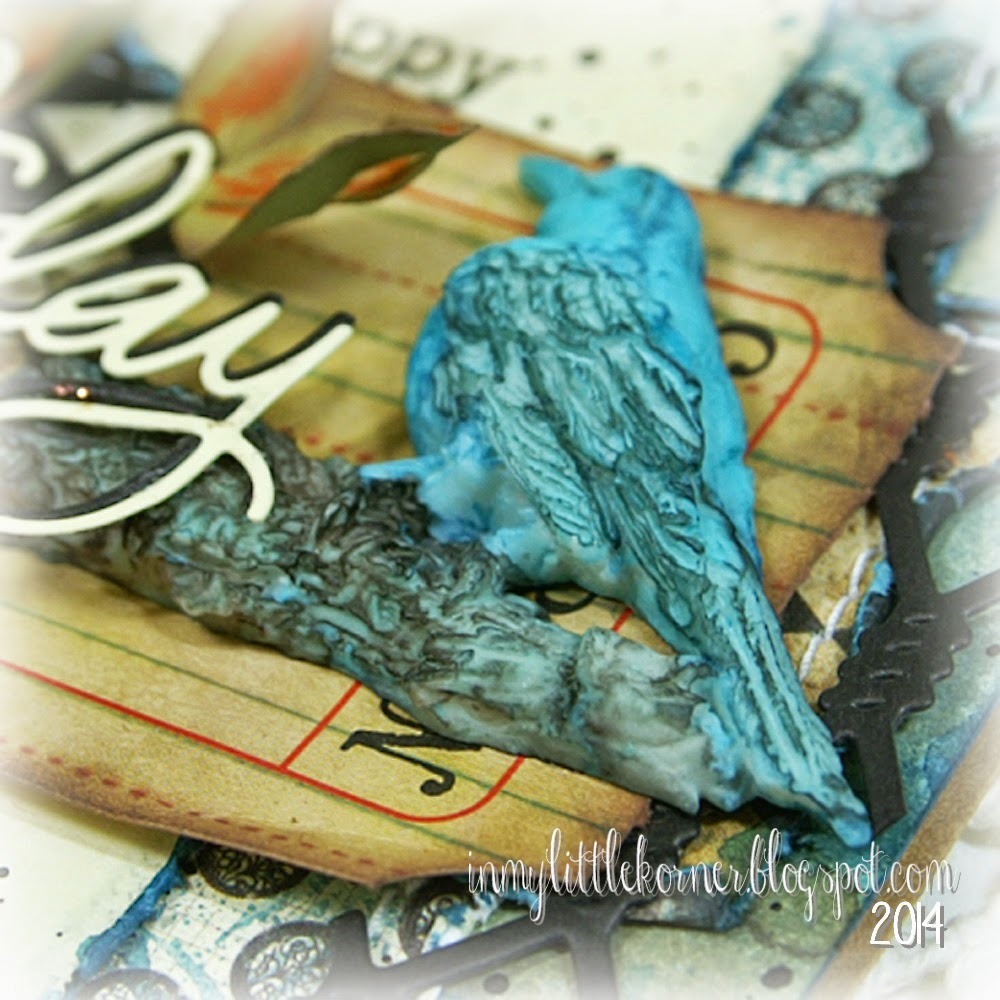
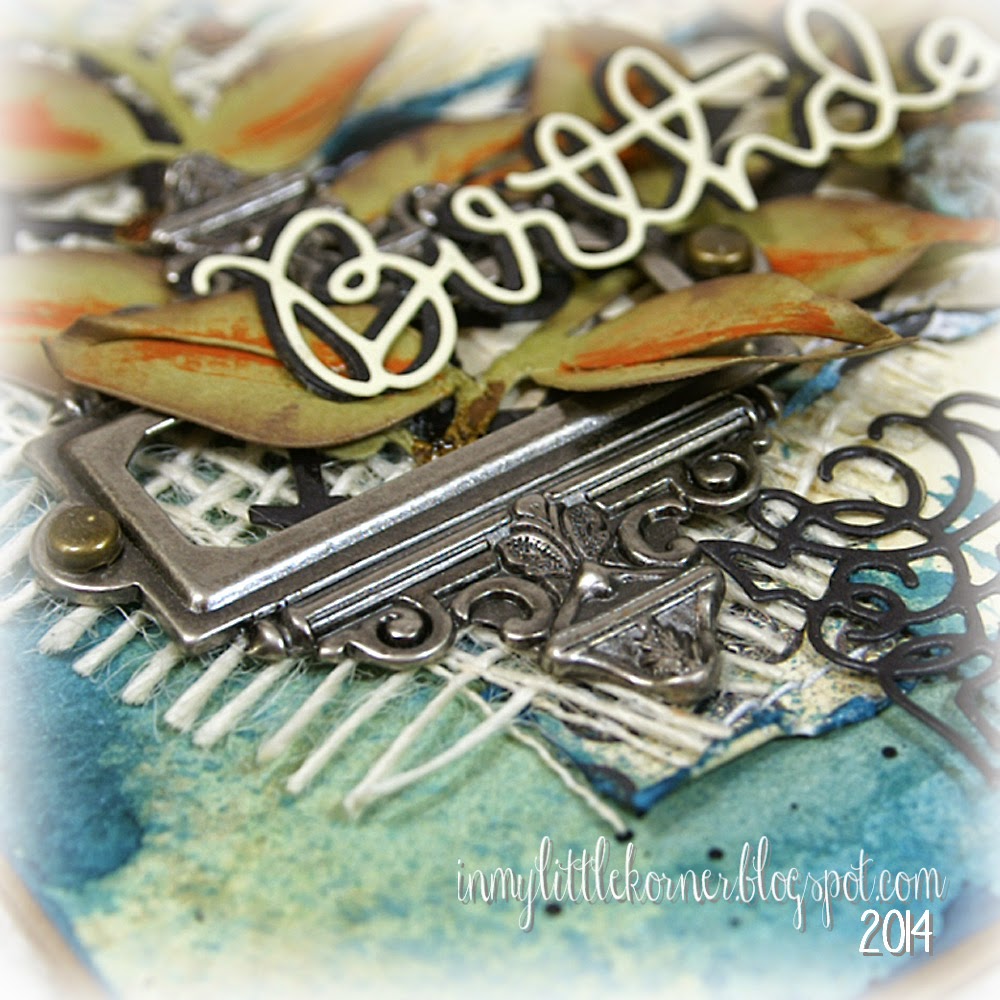


I used a combination of stamped words and a large die cut word for the sentiment...


Here's how the base piece looked before adding the papers and embellishments. This time, I used a light tan spray, added the medium green, then medium and deep blues...no orange in the background this time...


Supplies:
Patterned papers:   Authentique Enchanted collection
Sentiment stamp:  Winnie & Walter "The Big, The Bold, and The Happy"
Color mediums:   Lindy's Stamp Gang Flat Fabios (Danny Zuko's Denim,  Ocean Breeze Blue,  Merry Go Round Green,  South Shore Sand,  Sandra Dee Sepia)
Dies:   Simon Says Stamp "Happy Birthday";   La-LaLand Crafts "Diamond Wire" and "Berry Flourish" ;  
My Favorite Things "Four Corners Dienamics"
Resin Bird/Branch:   Prima            White burlap:   TheFunkieJunkie.com
Miscellaneous:   Tim Holtz Ticket and Ornate Bookplate;  Liquitex Ink!-Carbon Black;  Cinnamon stickles


Thanks for visiting today...have a wonderful weekend!


Wednesday, October 1, 2014

LLLC - Oodles of Doodles...

It's La-La Land Crafts Wednesday, and I'm posting a project today in a style I haven't made in a long, long time!

Our inspiration challenge this week is "Oodles of Doodles."  I used to doodle a lot when I made scrapbook pages, but the last time I put my doodling skills to the test was almost 8 years ago. And our Wednesday team is the die cut-focused team, so I wanted to find a fun way to incorporate the die cuts into my "doodle" project - something that was out of the ordinary.

After a couple experiments with different techniques, I hit on this idea...and I hope you find it as much fun as I did. I channeled my inner "flower child" and she came out swinging!

This is a 4 x 10 inch "canvas"...a piece of mixed media paper firmly glued to a couple pieces of sturdy matboard to form a working canvas. (Your eyes are not deceiving you...I did photograph the piece at a slight angle to adjust for the sparkle in the centers of the flowers)...


For the doodled scalloped borders at the top and bottom, I die cut a couple pieces of stencil plastic using the Scallop Border Die  (you could also do this with any thin plastic, like the clamshell packaging that many items come in these days - or even with cardstock), and traced the scalloped edge outline and small holes directly onto the canvas using a Pitt India ink pen. Another bonus of using the die this way is that I now have a stencil I can use again - I'm planning to try using it with modeling paste in the near future.


For the flowers, I cut 6 pieces of the Open Leaf Flourish die from white cardstock, and cut the leafy stems apart to use the individual leaves to form flower petals. I glued the cardstock petals to the canvas using matte medium, forming each of the flowers - they add a fun textural element!

Before painting the piece, I outlined the cardstock flowers and leaves with a thicker India ink pen, doodled designs around the outside edges of the flowers, and hand drew the stems and inside details.

Next was to add some light texture to the background, between the scalloped borders, with heavy gesso and a palette knife. I wanted it to look a bit like a skip trowel wall texture so it would absorb the background colors differently, and I think I got that! And finally, I stamped in a few random areas with a small script stamp, and a cross-stitch stamp, and now it was ready for color.


I used a variety of mediums for colors, building and blending as I went along, and adding touches with a white paint pen and a shading pencil when the paints were dry.

Finally, I found some fun aqua clear plastic flower gems in my stash...the perfect size for the centers of the larger painted flowers, and added a touch of orange Stickles. Here are some closeups of the flower details...


The leaves are also smaller pieces of the Open Leaf Flourish die cut leaves...I cut each one into a different shape, but painted them all the same colors...


Supplies:
Dies:   La-La Land Crafts Scallop Border and Open Leaf Flourish
Text stamp:   Prima Printery-Script           Stitch stamp:   Technique Tuesday - Hanging By a Thread
Color Mediums:   Lindy's Stamp Gang  Flat Magicals (Hibiscus Rose, Pineapple Paradise, Mango Mania, Caribbean Blue);
Magicals  (Merry Go Round Green,  Pop Rock Purple,  Raspberry Lemonade);
Flat Fabios  (T-Bird Turquoise, Summer Lovin' Sun)
Miscellaneous Mixed Media Supplies:   Heavy gesso,   matte medium,   Faber Castell Pitt pens,   Uni Posca white paint pen,   flower gems,   Orange Peel Stickles


You can see the rest of the team's fun projects for this challenge over at the  La-La Land Crafts blog. 

Thanks so much for stopping by today!


Monday, September 29, 2014

Watercolor - Clean and Simple...

Happy Monday, everyone!

Lately I've been working on some projects that are detailed, and filled with techniques and embellishments. My mojo needed a bit of a reboot...it was tired. So I pulled out one of my floral stamps, and the watercolors, and made a card, start to finish, in 2 hours.

I can hear you now, saying to yourself, "that's fast?" Yes, for me, that's fast. I tend to start in one direction, then change to another..for me to design in my head, paint, and assemble in 2 hours is a major accomplishment!  :)


I did add a bit of "shabby" to the card with distressed edges, including, this time, the edges of the card base itself. But I kept the embellishments to a minimum, with a twine bow, a few purple sequins, and a couple lacy die cut corners...


Supplies:
Stamps:   Unity Stamp Co., "Imperfection is Beauty";   Simon Says Stamp "Summer Garden"
Die:   Spellbinders Lace Hearts           Watercolors:   Sakura Koi
Miscellaneous:   black hemp twine,  sequins,   Uni Posca white paint pen


Thanks so much for visiting today. I'll be back Wednesday with another project that's pretty much a total departure from my usual style.

Until then, I hope your week is starting with a smile!


Thursday, September 25, 2014

LOTV - We Wish You a Merry Christmas...

TGIF...happy Friday! Today I have another shabby chic card to share with you, only this time it's as Christmas-y as it can get, and it's once again made with lots of pretty papers from Lili of the Valley. 

The "Pretty Papers" monthly challenge is still going on over at the LOTV Ideas to Inspire blog - you still have a few days to enter and be eligible for one of the three prizes up for grabs this month!

Today, I've used papers from the new 'Twas the Night paper pad, and lots of glittery die cuts, for this fun card...


I simulated the look of snow on the die cut pine branch by mixing coarse clear glitter with Polar White Flower Soft...


More coarse clear glitter was used on the die cut poinsettia, with tiny gold bells in the center to simulate yellow stamens...


Although the name of this particular doily die has nothing to do with Christmas, it makes me think of a snowflake when I tuck it behind other papers, so it was used to brighten up the corner of the card. (And, of course, the edges of the die cut doily had to be glittered, too!)...


This fun shaped sentiment is from LOTV's latest Christmas release - it's in the Set 75, Christmas Wishes  sentiment stamp set...


Supplies:
Patterned papers:   LOTV 'Twas the Night 
Sentiment stamp:   LOTV Set 75, Christmas Wishes
Dies:   Spellbinders Fleur de Lis Squares,  Classic Squares Large,  Classic Squares Small,  Layered Poinsettia,  Gold Elements One;      
Memory Box Star of Wonder;      Impression Obsession Pine Branch;
Prima Doily #2 Pineapple;      La-La Land Crafts Christmas Tree Hill
Embossing folder:   Cuttlebug Geometric Rings            
Miscellaneous:   Martha Stewart Clear Coarse Glitter;   Polar White Flower Soft;   mini bells; cheesecloth;  white craft paint


Thanks for visiting today...have a wonderful weekend!


Wednesday, September 24, 2014

LLLC - "Show Your Style" All Occasion Card...

Happy Wednesday...it's La-La Land Crafts Wednesday, and our inspiration challenge this week is "Show Your Style."

I seem to have quite a few "styles" these days, since I started playing around with watercolors and mixed media. But I went back to my roots...shabby chic...and used the elements that are most common to my "fully loaded" cards - lots of layers, distressing, flowers, pearls, and lacy accents.

I used the Scallop Bracket Die Set to create the layers on the front of the card, choosing to place my layers going up toward the top of the card rather than my usual top-to-bottom arrangement. Each scalloped layer, and the Heart Doily on the side, were outlined with dry-brushed white craft paint to accent the edges...


The die cut Berry Flourish was also dry-brushed with white paint, and it, and the flowers, were all accented with clear gel to look like dew drops...


To complement the pearl accents scattered around the front, I embellished a Maya Road heart stick pin with a couple spacers and pearl beads...


Supplies:
LLLC Dies:   Scallop Bracket Set of 4;  Heart Doily;  Berry Flourish
Patterned papers:   Prima Sunrise Sunset (6x6)
Scalloped lace:   TheFunkieJunkie.com          Flowers & stamens:   Wild Orchid Crafts
Pearls:   Recollections
Miscellaneous:   Viva Glass Effects clear gel;  Hug Snug seam binding;  Maya Road heart stick pin;  cheesecloth


You can see more team members' projects over on the La-La Land Crafts blog and over on the LLLC Facebook page.

Thanks for stopping by to visit today!


Monday, September 22, 2014

Make Time...a Mini Mixed Media Canvas...

It's the start of another new week...Happy Monday, everyone!

There's a fun September color challenge posted over at  Lindy's Stamp Gang, and I wanted to give this a try - I was intrigued with the bold, deep colors and ready to work with the darker tones for a change.


I started playing around with some ideas and materials, on a small 6 x 6 canvas, and when I was finished, I liked it...now what to do with it? :)

I started digging through my stash of embellishments and "fun stuff"...continued spraying, and custom-coloring, layering pieces on the canvas - my mojo was on a roll. I had a quote in my little notebook of "quotes I'll use some day" that was perfect - about making time for the have-to-do's and taking time for the love-to-do's (the words are different, and I may use the whole quote one day). But this time, the piece is only 6 x 6...the whole quote would almost fill the square! So I shortened it...and this is how it turned out in the end...


This is how the canvas looked after I finished playing with color and art mediums, and decided I might be able to turn this into something fun - the shading around the stenciled clock and strips of tissue tape hadn't been added yet. (There's a linked list of the specific background color mediums I used at the end of this post)...


I layered a metal clock embellishment, that I tinted with turquoise and terra cotta alcohol inks, over the stenciled clock in the upper left corner...


The only pre-made flower in the bunch is the golden tinted rose in the center. I assembled all the others using flat flowers, spraying and layering and shaping to make a few roses and mums, and a large layered multicolored flower...


The metal leaves started out a beautiful vintage bronze color, but they needed to be brightened and colored to stand out just a bit more. I added green and terra cotta alcohol inks to them...


I found an adorable white resin bird on a branch in my stash...perfect once I sprayed and brushed it with a few colors of Flat Fabios...


This little gold clock charm was treated to a coat of terra cotta alcohol ink, and now it was a little touch of copper on that side...


Supplies:
Color Mediums:   Lindy's Stamp Gang Flat Fabios (Danny Zuko's Denim,  Kissin' Kenickie Coral,  Ocean Breeze Blue,  South Shore Sand);    Lindy's Stamp Gang Flat Magicals (Tres Chic Collection - Cafe au Lait  and  Bonjour Butter);   
Adirondack Alcohol Inks (Stream, Terra Cotta, Meadow)
Art Mediums:   Golden Modeling Paste,  Golden Crackle Paste
Stencils:  The Crafters Workshop Chickenwire Reversed, and Mini Time Travel;   Heidi Swapp Chevron
Dies:   My Favorite Things Royal Leaves            Flowers:   Prima
Stamens:   Wild Orchid Crafts              Resin bird/branch,  metal clock:   Prima
Lace, white burlap, metal leaves:   TheFunkieJunkie.com
Miscellaneous:   Tim Holtz Tissue Tape ;   Uni Posca white paint pen;   Stabilo All pencil
Miscellaneous craft store supplies:   cheesecloth,  wooden scroll


Thanks for visiting today...I hope your week is starting with a smile!


Related Posts Plugin for WordPress, Blogger...