Friday, March 29, 2013

Easter Wishes For You...

Today's Easter card involved a little experimentation on my part with another of my newer sets of dies. Much like the Opulent Oval dies used in yesterday's card, the Adorning Squares set comes with dies that emboss only and some that cut and emboss, and there are almost countless ways you can combine them.  I wanted to see if I could get a debossed look with some of the dies, and it actually worked the way I had planned...a pleasant surprise, because that's definitely not always the case with my ideas! LOL

Another happy discovery was finding that one of the Parisian Motif dies fit perfectly inside the solid center of the square die combo...it was all a series of fun surprises while die cutting this one...


I was able to get the debossed look I wanted by combining two of the square dies (the two largest in the set) and embossing them (no cutting at all) onto the square of cream cardstock.  Then I cut and embossed the purple cardstock with just the smaller of the two dies used on the cream.  After I glued the purple over the cream, matching the patterns, I ran it though the diecut machine with the circle die to cut out the center.  When I did that, it pressed the purple and cream layers together and gave it the debossed look I was after.

Wrapping floral sprays around shapes is one of my new favorites these days...and this design lent itself well to that...


The pretty cream ribbon flower with a pearl center came pre-made from the craft store...another happy accidental find as I cruised through the sale section one day...


The digi collage is "sunken" beneath the circle die cut into the cream/lavender layer, and the green layer.  It's adhered to the light lavender background layer, then the other two layers are adhered above it - the green layer with foam tape...


Supplies:
Dies:   Spellbinders Adorning Squares, Parisian Motifs, Standard Circles Large, Standard Circles Small;
My Favorite Things Royal Leaves
Floral digital image:  The Graphics Fairy        Sentiment stamps:  Papertrey Ink
Paper Flowers:  Wild Orchid Crafts       Martha Stewart Medium Branch Punch       Pearls:  Recollections
Ribbon flower:  local craft store       Handcrafted stick pin


Thanks so much for visiting today.  I hope you have a wonderful weekend, and if you're celebrating the holiday, a blessed Good Friday and Easter Sunday.


Wednesday, March 27, 2013

Easter Flutter-By...

I'll be sharing Easter cards today and Friday, but even if you don't participate in the celebration of this holiday, the cards could be easily adaptable for any occasion...well, any occasion where flowery cards would be appropriate...LOL

The focal point of today's card is another digital collage...clipped to an oval shape to fit another of the oval dies in the same set as used on last week's pink and purple birthday card...


The frame is popped up from the card front with foam tape. Rather than place the frame over the oval collage as on last week's card, the collage is cut with the decorative oval and sits above the frame on this card...popped up with a double layer of foam tape...


To continue the thick row of pearls from the left side of the card over to the right, I glued the center of the bows in line with the pearls, and placed another small cluster over the bow centers...of course, I had to add one of my fun stick pins...


It's hard to see, even in the close-up, but there's clear coarse glitter on the daisy petals...


Supplies:
Patterned papers:  Graphic 45 Fashionista/Vintage Cherries (dots-"b" side);  Prima Divine collection (aqua)
Dies:  Spellbinders Opulent Ovals;  Classic Ovals Large
Digi collage elements:  French label: The Graphics Fairy;   Background paper: KPertiet/Designer Digitals/Inspiring-4;  
 Grid pattern:  KPertiet/Designer Digitals/Ledger Grids 1;   Butterfly floral:  Karenswhimsy.com (Easter pictures-5)
Crocheted lace:  TheFunkieJunkie.com        Pearls:  Recollections        Sentiment stamps:  Hero Arts;  Papertrey Ink
Hug Snug seam binding       Handcrafted stick pin


Thanks for stopping in for a visit today...I hope you're having a wonderful week!

Sunday, March 24, 2013

TSTR-Lovely Layers

Happy start-of-a-new-week, all!  I hope you had a great weekend.

It's the final week of my Guest Designer feature at The Shabby Tea Room, and it's been an especially fun month of challenges, including this week. Rebekah is our host, and our challenge was to use the colors in the photo and the sketch as a guide for our layout design.

So, here's my card for this week...


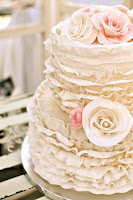
based on this inspiration photo and sketch...


You can see right away I picked up on the pink roses in the inspiration photo. :)  I added more pink highlights by lightly inking all the edges of the patterned paper layers, and distressing them slightly with an edge distresser to mimic the ruffled effect in the photo...


Lots of pearls were added, with the strung strips of pearls atop the wide crocheted lace, and loose pearls scattered through the cardstock flourishes and in the upper corner...


And last but not least, a peek at the inside...


Supplies:
Patterned papers:  Bo Bunny Chiffon Dot (cream dot);  Authentique Gathering collection (cream floral);  Pink Paislee Butterfly Garden collection (text);  Cosmo Cricket Circa 1934 collection (black numbers)
Edge Punch:  Martha Stewart Daisy Edge     
Dies:  My Favorite Things Decorative Doily Duo and Mini Rolled Rose;   Memory Box Elegant Scrollwork
Shabby fabric rose:  Frogfeathers on Etsy          Pearl strips:  Suhafuha on Etsy      
Mini flower applique:  TheFunkieJunkie.com         Loose pearls:  Recollections     
Sentiment stamp:  Technique Tuesday/Ali Edwards
Miscellaneous craft store supplies:  cheesecloth, cotton laces


Thanks for visiting today...I hope your week is starting with a smile!


Friday, March 22, 2013

Easter's On Its Way...

I'm making up just a few Easter cards this year, and today I can show you the first.  Rather than use a holiday-specific embellishment or paper, I opted to go for the feeling of Easter...soft pastel colors and, of course, flowers.

I pulled out one of my favorite My Minds Eye 6x6 paper pads with soft Spring colors, and realized, with this card, I have officially used up every sheet in this paper pad with the exception of the saved "scrap" pieces...and I've done it twice. :)  Guess it's time to see if I can still find a new third pad somewhere!

I thought I was being oh-so-very-clever by using one of my shaped rectangular dies and cutting only the front of the card with the shape, leaving the back/inside in the original straight shape...until an online friend posted a similarly shaped card, and when I complimented her on her fine imagination (two great minds and all that), informed me that a large manufacturer already sells pre-cut cards in this shape. OK, fine, so I'm not that clever after all...LOL.


The golden-yellow flower trim came from a new favorite Etsy seller...I topped it with mini paper roses, punched branches, diecut leaves, and a few little pearls scattered here and there...


Each of the scalloped patterned paper layers are popped off the card base with foam tape for a little bit of dimension...


Instead of using pearl flourishes, I used the small pearl sprays from the craft store...then added a pearl stick pin woven through the small sentiment tag...


And finally, a side view with a peek to the inside...


Supplies:
Patterned papers:  My Minds Eye Miss Caroline/Fiddlesticks collection
Dies:  Spellbinders Grand Scalloped Rectangles;  My Favorite Things Royal Leaves
Punches:  Fiskars Threading Water;  Martha Stewart Medium Branch
Gold rose trim:  Suhafuha on Etsy      Mini paper roses:  Wild Orchid Crafts
Loose pearls:  Recollections      Pearl stems:  local craft store
Sentiment stamp:  Papertrey Ink      Handcrafted stick pin


Thanks for visiting today...I hope you have a wonderful weekend!

Wednesday, March 20, 2013

Hybrid Happy...Take Two...

I have another shabby birthday card to share today, and this time, not only do I have a digital collage as the focal point, but once again, the background patterned paper is digital, too. But unlike Monday's card, today's card is in brighter springtime colors - pink and lavender together make me think of Easter eggs, and that makes me think of spring. :)

I've used this particular vintage label and floral collage before, but this time I clipped it to an oval shape to fit some new oval die and frame shapes that I'm having fun with these days...


I dyed some Hug Snug seam binding to match the papers, and topped the bows with a few mini paper roses, punched branches, and mini pearls sprinkled among them...


The rose images in the collage are front and center on this card, so I added some clear coarse glitter around the edges of the petals...just for a little extra subtle sparkle...


The wider piece above the oval frame is the top half only of another frame die...it's been coated lightly with clear coarse glitter. The oval frame and image inside it are raised from the card with foam tape, while the top scroll is adhered directly to the front of the card...


Even the colored mat papers on the inside have been distressed around the edges, for a little shabby touch there, too...

Supplies:
Patterned papers:   Designer Digitals/M Terasawa Web Freebie (pink background);   PlayingWithBrushes Torn Paper (worn edge detail);  Basic Grey Sugar Rush collection (lavender solid)
Oval Floral and French label:  The Graphics Fairy
Dies:  Spellbinders Opulent Ovals, Classic Ovals Small, Twisted Metal Tags & Accents  
Punches:  Martha Stewart Doily Lace and Medium Branch      Pearls:  Recollections      Sentiment stamp:  Papertrey Ink
Mini roses:  Wild Orchid Crafts      Hug Snug seam binding


Thanks so much for visiting today!


Sunday, March 17, 2013

TSTR-Anything Goes...

It's another wonderful challenge at The Shabby Tea Room ...Lenet is our host, and it's "Anything Goes" this week-we can use anything that gave us inspiration for our project. This was a fun one, because I remembered a photo that, when I saw it, thought would be a great inspiration for a card...and what better time to put that photo to use than for this week's challenge!

If you've never visited Dawn Edmonson's blog, The Feathered Nest, and you're a fan of shabby chic everything, then you're missing some real fun.  Back in February of this year, Dawn posted a photo of her beautifully shabby chic china hutch  (it's at the bottom of the post, past the wonderful vintage images, and the beautiful pillows and matching sachets, and all kinds of other fun eye candy).  So today's card is thanks to Dawn and her wonderful inspiration piece.

This birthday card is in reserve for someone special...(I have lots of summer birthdays coming up!)...


And was totally inspired by this hutch photo...the soft and distressed beige and cream tones, the white dishes with the tiny pink flower pattern, the neutral floral clusters...so much to look at and admire...


Instead of running the sheer embroidered ribbon across the card, I cut a snippet, folded it over, and glued it beneath some of the flowers...just the "tail" of the bow instead of the loops...


It was a bit of a challenge because of its shape and size, but I distressed the edges of the small sentiment block to match the other card edges before I glued it to a piece of lightweight chipboard and popped it up off the card with foam tape...


Lastly, here's a side view with a peek to the inside...

Supplies:
Patterned papers:  Prima Romantique collection (text);  Prima Almanac collection (solid pink);  Basic Grey
Basics Cream collection (dot);  Prima IOD Rue 88 Coordinates 3 (digital rose floral-desaturated)
Punches:  Martha Stewart Doily Lace;  Martha Stewart Medium Branch
Dies:  Spellbinders Fancy Framed Tags Two;  Memory Box Whimsy Circle      Paper roses:  Wild Orchid Crafts
Pearls:  Prima      Sheer embroidered ribbon:  TheFunkieJunkie.com      Sentiment stamp:  Hero Arts
Miscellaneous:  tea dyed cheesecloth, crocheted cotton lace


Thanks so much for visiting today...I hope your week is starting with a smile!


Friday, March 15, 2013

Many Thanks...

I love patterned papers. When new lines come out, I still want to purchase my new favorites...mostly in the 6x6 pad format, since I prefer the smaller sized patterns for cards. As you might imagine, this means after a few years of doing this, I've built up a "pleasing" supply of paper pads at my disposal. :) Every now and then, I intentionally go through the pads to find older lines that I still love but haven't used in a while, and make up projects with them. Today's card uses an older line from Pink Paislee that's still a favorite...


There it is again...one of my favorite shabby fabric roses, with clusters of paper roses and leaves on top. By the time I was finished with the lacy edges on the papers and the wide crocheted lace across the front, flowers seemed to be the only embellishment that fit with the rest of the design...


I liked the way the cardstock flourishes looked...but the dark brown on its own was too stark...and the aqua on its own was too pale...but the aqua offset over the brown gave exactly the effect I wanted.  I added a few brown pearls over the flourish to balance the pearls at the top...


And a peek at the inside...


Supplies:
Patterned papers:  Pink Paislee Queen Bee collection
Sentiment Stamps:  Paper Sweeties ("Many Thanks");  Hero Arts ("You always know...")
Dies:  Memory Box Elegant Scrollwork;  My Favorite Things Royal Leaves      Edge Punch:  Martha Stewart Doily Lace
Shabby fabric flower:  Frogfeathers on Etsy      Paper roses:  Wild Orchid Crafts
Pearls:  Prima      Tim Holtz Memo Pin     Crocheted lace, small fabric flower:  local craft stores


Thanks for stopping by for a visit...I hope you have a great weekend!


Wednesday, March 13, 2013

Kraft-y All Occasion...

I love kraft colored cardstock...I'm not sure why, because on its own it's pretty bland.  Maybe it's the challenge to see how I can turn that bland into something fun, or elegant, or when I'm in a monochromatic mood, peaceful and calm.

With this card, I wanted to brighten it up, and make it purely feminine and frilly.  I started by die cutting scalloped edges on all the layers, and adding some white to the background...and that seemed to snowball as I added embellishments, including a beautiful wide white crocheted lace...until I ended up with this as a final result...


I found a package of small wooden clock faces at the local craft store, and discovered that the smallest one fit perfectly in the center of the shabby cabbage roses I'm so fond of using.  I surrounded it top and bottom with sprays of assorted small flowers, punched branches, and leaves...and scattered small pearls here and there, including on top of the cardstock flourish...


Supplies:
Patterned papers: Echo Park Be Mine collection (pink);  Echo Park For The Record collection (blue & kraft text)
Wide Crocheted Lace:  TheFunkieJunkie.com      Pearl strip:  SuhaFuha on Etsy
Shabby fabric rose:  Frogfeathers on Etsy      Mini wooden clock face:  Recollections
Dies:  Spellbinders Classic Scallop Edgeabilities;   Memory Box Elegant Scrollwork;  My Favorite Things Royal Leaves      
Martha Stewart Medium Branch punch          Pearls:  Recollections      
Mini roses:  Wild Orchid Crafts and LayoutsFromTheHeart on Etsy


Thanks for visiting today!


Sunday, March 10, 2013

TSTR-Oh So Pretty in Pink

I hope you had a fun weekend...it was fun to have that additional hour of daylight today thanks to the start of Daylight Savings Time. :)

There's another fun challenge this week over at The Shabby Tea Room. Debbie is our host, and this week's challenge is to use pink, ribbon, lace and/or tulle, and a flower...some of my favorite elements!

I love shaped cards, and wanted to try something just a little different this time.  I used the Cherish Punch Around the Page set of punches, but rather than make it into a square card as I've done in the past, I made it a little more rectangular. (I used a piece of cardstock cut to 5" wide x 10.25" long, punched the corners and then the edges, then simply folded in the center to form the card base.)  In actuality, there's only a 1/4" difference between the height and width measurements of the finished card, but the solid area inside the punched holes makes it look like there's more.

I have a very special person and occasion in mind for this one.  Here's my finished card for this week's challenge...


...and here's the adorable inspiration photo Debbie's based the challenge on.  You'll probably see this photo again here as an inspiration cue...I had several fun ideas for cards when I saw this. 


This shabby pink fabric flower matches perfectly with the Hug Snug seam binding that I had dyed with Spun Sugar Distress Ink, and I couldn't resist topping it with a few neutral colored roses and pearls...


The scalloped crocheted lace runs down the right side of the top cardstock piece, and I added a single scalloped piece of it peeking out the left side, too.  Both of the two smaller patterned paper blocks are adhered to the larger text paper block with foam tape for dimension...


And finally, here's a peek at the inside...


Supplies:
Patterned papers:  Prima Tea Thyme collection      Edge and corner punches:  Martha Stewart Cherish PATP
Dies:  Memory Box Quinn Flourish and Elegant Scrollwork;  My Favorite Things Royal Leaves
Shabby fabric rose and sheer embroidered lace:  TheFunkieJunkie.com
Paper roses:  Wild Orchid Crafts      Pearls:  Recollections      Scalloped crocheted lace:  Prima
Hug Snug seam binding      Handcrafted stick pin      Miscellaneous:  cheesecloth, tulle, clear coarse glitter


Thanks for visiting today...I hope your week is starting with a smile!


Related Posts Plugin for WordPress, Blogger...